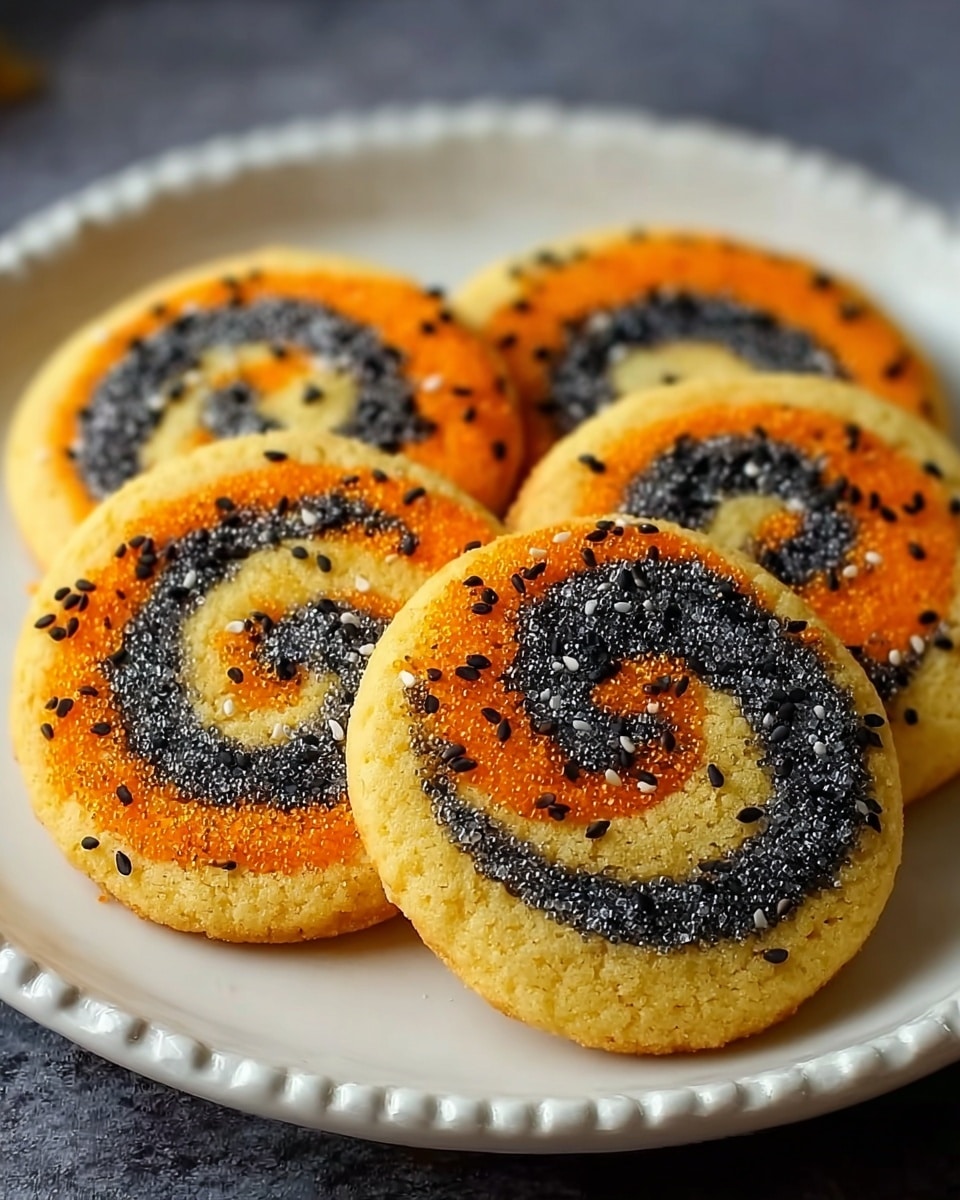
If you’re looking for a cheerful way to bring some Halloween spirit to your kitchen, this Spooky and Fun Pinwheel Cookies Recipe is an absolute must-try! These soft, buttery sugar cookies feature captivating swirls of festive colors like orange, purple, green, and black that instantly brighten up any spooky celebration. Whether you’re baking with kiddos, preparing treats for trick-or-treaters, or impressing party guests with a fun and eye-catching twist on classic cookies, these delightful pinwheels are bursting with personality and flavor. Their colorful design is just the beginning—the tender texture and rich vanilla undertones will have everyone coming back for more.
Ingredients You’ll Need
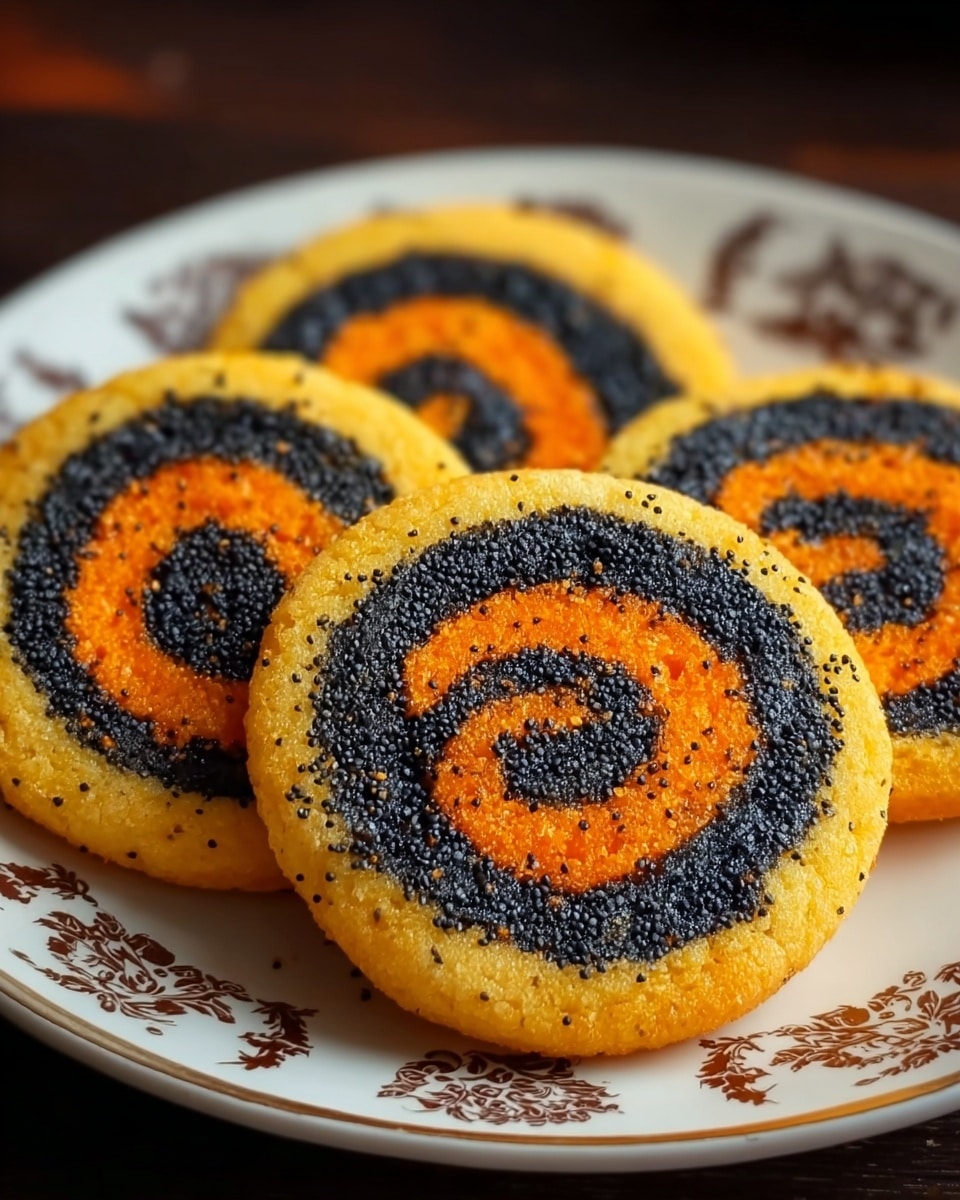
Getting the perfect Spooky and Fun Pinwheel Cookies Recipe starts with simple, pantry-friendly ingredients that each play an important role. From the tender butter that gives the cookies their soft crumb to the vibrant gel food coloring that creates the signature swirls, every component works in harmony to make this cookie unforgettable.
- 2 ½ cups (300 g) all-purpose flour: The sturdy base that provides structure without overpowering tenderness.
- ½ tsp baking powder: A slight lift to keep your cookies light and airy.
- ½ tsp salt: Balances sweetness and enhances overall flavor.
- ¾ cup (170 g) unsalted butter, softened: Adds richness and a melt-in-your-mouth softness.
- 1 cup (200 g) granulated sugar: Brings sweetness and contributes to beautiful browning.
- 1 large egg: Binds ingredients and lends a tender texture.
- 1 ½ tsp vanilla extract: Infuses comforting warmth and amplifies all flavors.
- Gel food coloring (orange, purple, black, or green): Ensures vivid, festive colors that pop.
- ½ cup Halloween sprinkles (optional, for rolling edges): For an extra dose of spooky fun and texture.
How to Make Spooky and Fun Pinwheel Cookies Recipe
Step 1: Mix Dry Ingredients
Start by whisking together the flour, baking powder, and salt in a medium bowl. This ensures even distribution so your cookies bake consistently and have the perfect crumb.
Step 2: Cream Butter and Sugar
In a large bowl, beat the softened butter and granulated sugar until fluffy and pale. This step is essential for creating a tender texture and light crumb. Once fluffy, add the egg and vanilla extract, mixing until everything is smoothly combined.
Step 3: Combine Wet and Dry
Gradually add the dry ingredients to your wet mixture. Mix gently just until the dough forms; overmixing here can make the cookies tough, so be gentle and stop as soon as the dough comes together.
Step 4: Color Your Dough
Divide the dough into portions depending on how many colors you want to use. Tint each one with a generous amount of gel food coloring. Gel type will give you the brightest, most vibrant colors—perfect to capture that spooky, fun mood!
Step 5: Roll Out Colored Layers
Roll each colored dough separately into thin rectangles approximately ¼ inch thick. Try to make them fairly even in thickness; this will make rolling the pinwheel layers much easier and neater.
Step 6: Layer and Roll the Log
Stack your colored rectangles gently on top of each other, then carefully roll the stacked layers into a tight log. This rolling action creates the iconic swirl pattern that makes these cookies so distinctive. Wrap the log tightly in plastic wrap to keep its shape.
Step 7: Chill the Dough
Place your wrapped log in the refrigerator for at least 2 hours or overnight. Chilling firms up the dough, making slicing much cleaner and preserving those beautiful colorful swirls during baking.
Step 8: Slice and Bake
Preheat your oven to 350°F (175°C). Unwrap the chilled log and slice into ¼-inch thick rounds. If you want, roll the edges in festive Halloween sprinkles for an extra splash of color and crunch. Place your cookie rounds on parchment-lined baking sheets, leaving space to spread, and bake for 9 to 11 minutes until just set.
Step 9: Cool and Serve
Transfer your warm cookies to a wire rack to cool completely. This helps them set perfectly so when you bite into a pinwheel, you get a soft, buttery cookie with a festive swirl every time!
How to Serve Spooky and Fun Pinwheel Cookies Recipe
Garnishes
Adding a little something extra while serving can elevate your cookies even more. Lightly dusting with edible glitter or powdered sugar creates a magical shimmer that plays wonderfully with the vibrant pinwheel colors. For a little extra crunch, try a sprinkle of finely chopped nuts or more colorful sprinkles around the edges.
Side Dishes
These cookies pair beautifully with simple drinks like a classic glass of cold milk or a warm cup of spiced tea or cocoa—especially those rich, autumnal flavors that complement the soft vanilla sweetness of the cookies. For a festive twist, serve with whipped cream or a scoop of cinnamon ice cream.
Creative Ways to Present
Presentation is half the fun with pinwheel cookies! Arrange them on a tiered platter or line them up on a spooky Halloween-themed plate. You can also stand some upright in a mason jar alongside colorful straws or festive popsicle sticks for a playful touch at parties. Trying out varied arrangements makes sharing your Spooky and Fun Pinwheel Cookies Recipe even more exciting.
Make Ahead and Storage
Storing Leftovers
You can keep your baked pinwheel cookies fresh for up to one week stored in an airtight container at room temperature. To maintain their soft texture, add a slice of bread or a damp paper towel inside the container—it helps keep them perfectly tender.
Freezing
If you want to prepare ahead, these cookies freeze well either pre-baked or after baking and cooling. Wrap them tightly in plastic wrap and place in a freezer bag for up to three months. When ready, thaw at room temperature or warm gently in the oven to restore their fresh-baked charm.
Reheating
To enjoy your pinwheel cookies just like they came out of the oven, pop them in a 300°F (150°C) oven for about 5 minutes. This warms them through and brings back that delightful softness and buttery aroma, making every bite feel freshly made.
FAQs
Can I use regular food coloring instead of gel?
Regular food coloring can be used, but it tends to thin out the dough and produces less vibrant colors. Gel food coloring is preferred because it’s concentrated, giving you the bold hues that make these cookies truly striking.
What’s the secret to neat pinwheel swirls?
Chilling your dough log thoroughly is crucial to clean slices and defined swirls. Also, rolling the dough evenly and tightly helps prevent the layers from separating during baking.
Can I make these cookies gluten-free?
Yes! Use a gluten-free all-purpose flour blend designed for baking. Keep in mind that texture can vary slightly, so chilling the dough longer might help with handling and shaping.
How long will the unbaked dough keep in the fridge?
You can store the wrapped dough log in the fridge for up to 3 days before baking. Just keep it well-sealed to prevent drying out or absorbing other odors from your fridge.
Are these cookies suitable for kids to help make?
Absolutely! The colorful rolling and layering process is perfect for little hands. Plus, kids love seeing the fun pinwheel patterns appear as the cookies bake. Just supervise the slicing and oven steps for safety.
Final Thoughts
Bringing a little magic and spookiness into your baking has never been easier or more fun than with this Spooky and Fun Pinwheel Cookies Recipe! Whether you’re celebrating Halloween, autumn, or just craving a burst of color and buttery sweetness, these cookies are sure to become a treasured favorite. So roll up your sleeves, invite the family, and bake yourself some delicious memories that will light up any season with joy.
Print
Spooky and Fun Pinwheel Cookies Recipe
- Total Time: 2 hours 36 minutes
- Yield: About 24 cookies
Description
These Spooky and Fun Pinwheel Cookies are soft, buttery sugar cookies swirled with vibrant Halloween colors like orange, purple, green, and black. Perfect for festive parties, trick-or-treating, or baking with kids, these cookies are easy to customize and sure to impress with their delightful, eye-catching design.
Ingredients
Dry Ingredients
- 2 ½ cups (300 g) all-purpose flour
- ½ tsp baking powder
- ½ tsp salt
Wet Ingredients
- ¾ cup (170 g) unsalted butter, softened
- 1 cup (200 g) granulated sugar
- 1 large egg
- 1 ½ tsp vanilla extract
Additional
- Gel food coloring (orange, purple, black, or green)
- ½ cup Halloween sprinkles (optional, for rolling edges)
Instructions
- Mix Dry Ingredients: In a medium bowl, whisk together the all-purpose flour, baking powder, and salt until evenly combined.
- Cream Butter & Sugar: In a large mixing bowl, beat the softened unsalted butter and granulated sugar until the mixture is fluffy and light. Then add the egg and vanilla extract, mixing well until smooth and fully combined.
- Combine: Gradually add the dry ingredients to the wet ingredients, mixing just until a dough forms. Be careful not to overmix to keep the cookies tender.
- Color Dough: Divide the dough into portions based on the number of colors you want. Tint each portion with gel food coloring (orange, purple, black, green) until you achieve vibrant, spooky hues.
- Roll Out Layers: Roll each colored dough portion into rectangles about ¼ inch thick on a lightly floured surface.
- Layer & Roll: Stack the colored dough rectangles on top of each other in any order you prefer. Roll the stacked layers tightly into a log shape. Wrap the log tightly in plastic wrap.
- Chill: Refrigerate the dough log for at least 2 hours or overnight to firm up, which helps maintain clean swirls when slicing.
- Slice & Bake: Preheat your oven to 350°F (175°C). Slice the chilled dough log into ¼-inch rounds. Optionally, roll the edges of each slice in Halloween sprinkles. Place the slices on a baking sheet lined with parchment paper, leaving space between each cookie. Bake for 9 to 11 minutes, or until the edges are lightly golden.
- Cool & Serve: Transfer the cookies to a wire rack and allow them to cool completely before serving or storing.
Notes
- Chill dough thoroughly to achieve neat pinwheel swirls and easier slicing.
- Use gel food coloring for bright, vibrant Halloween colors that won’t affect dough consistency.
- Trim edges of dough rectangles before stacking for more even and uniform pinwheels.
- Work quickly when rolling and stacking dough; if it softens too much, return to the fridge to firm up.
- Prep Time: 25 minutes
- Cook Time: 11 minutes
- Category: Dessert, Cookies
- Method: Baking
- Cuisine: American, Holiday

