If you’re looking for a festive and absolutely delightful treat that brings smiles and a bit of winter magic to any gathering, the Snowman Cake Pops Recipe is your new best friend. These adorable little snowmen, crafted from a perfect blend of vanilla muffins, Oreo crumbs, and cream cheese, all coated in smooth white chocolate, are as much fun to make as they are to eat. Every bite delivers a luscious balance of creamy, crunchy, and sweet, wrapped up in a charming snowman design that’s sure to brighten up your dessert table and warm your heart.
Ingredients You’ll Need
Though this recipe might feel fancy when you first see the final result, the ingredients needed are wonderfully simple and easy to find. Each element plays a crucial role, contributing texture, flavor, or the perfect look for your snowman cake pops.
- Cream cheese: Adds creaminess that binds the crumbs into a soft, moldable dough.
- Vanilla muffins: Provide the sweet, fluffy base for the cake pop’s body.
- Oreo cookies: Bring a hint of cocoa flavor and a slight crunch when processed into crumbs.
- White chocolate: This is what gives the snowman their snowy, glossy coat and that irresistible sweet finish.
- Dark chocolate: Essential for drawing the cute facial features and buttons with contrast and detail.
- Sticks or straws: To hold the snowman securely and give them that classic cake pop look.
- Gummies or sprinkles: Perfect for decorating the snowman’s nose with a fun pop of color and texture.
How to Make Snowman Cake Pops Recipe
Step 1: Prepare the Crumbs
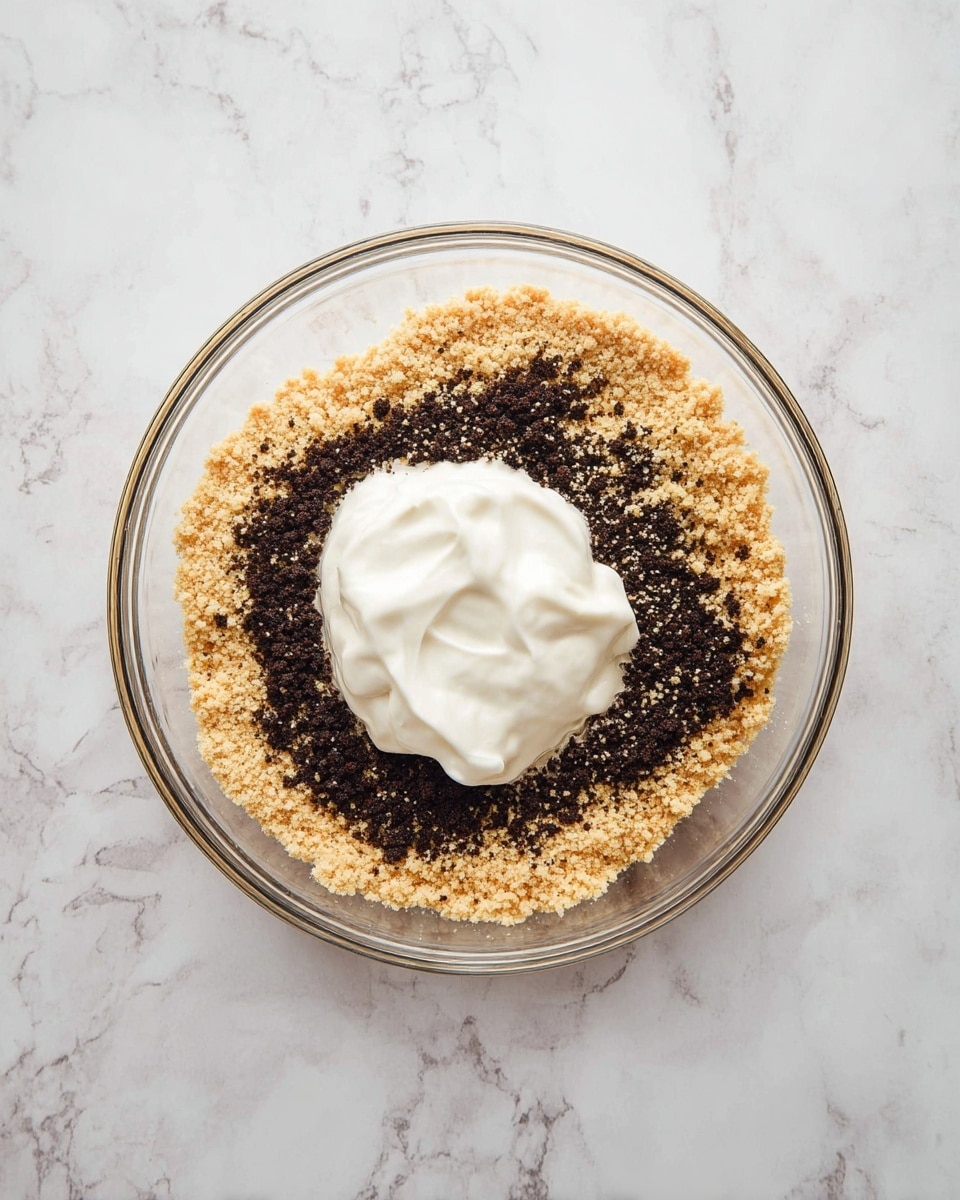
First, break down the Oreo cookies by placing them in a food processor and pulsing until you have fine crumbs. This will give your cake pops a subtle chocolate bite. Set these crumbs aside for the next step.
Step 2: Crumble the Muffins
Take those vanilla muffins and crumble them finely in a large bowl. This soft crumb base is what makes the snowman’s body light and fluffy while still sturdy enough to hold its shape.
Step 3: Mix Crumbs Together
Now, combine the Oreo crumbs with the muffin crumbs. Mixing these two gives the cake pops that incredible texture contrast and a richer flavor profile.
Step 4: Add Cream Cheese
Blend in the cream cheese with your hands until you have a soft, uniform dough. The cream cheese acts as a perfect binder here, making the mixture easy to mold and giving a creamy undertone to the cake pops.
Step 5: Melt the White Chocolate for Assembly
Melt about a quarter of the white chocolate slowly, either in short microwave bursts or over a double boiler. This will be used to “glue” the snowman’s parts together, so keep stirring to ensure it’s smooth and silky.
Step 6: Shape the Cake Pop Balls
Divide your mixture into 16 equal portions, and roll each into smooth balls with your hands. The even sizing is key to making your snowman bodies balanced and cute.
Step 7: Assemble the Snowmen
Using the melted white chocolate, brush a little on top of one ball, then carefully thread a second ball onto the same stick or straw. This creates the classic two-ball snowman shape, with the “glue” helping them stay put.
Step 8: Freeze the Cake Pops
Place your assembled snowmen on a tray and stick them in the freezer for at least an hour. Freezing makes them firm, allowing for easier dipping without losing the shape.
Step 9: Melt All the White Chocolate
Once your pops are firm, melt all the remaining white chocolate until fully smooth. This will be the coating that gives your snowman that cool, snowy finish.
Step 10: Dip Your Cake Pops
Dip each snowman carefully into the melted white chocolate, making sure to coat every inch evenly. This step turns your cake pops into beautiful white snowballs that are almost too cute to eat.
Step 11: Let Chocolate Dry Completely
Place the dipped pops upright and give the chocolate time to set and harden properly before moving on to decorating.
Step 12: Decorate with Dark Chocolate
Melt a bit of dark chocolate, then use a piping bag or toothpick to draw sweet little eyes, smiles, and buttons on your snowmen. These details bring your creations to life with personality.
Step 13: Add the Nose
Stick a gummy or sprinkle onto each snowman for the nose—this colorful touch is reminiscent of a carrot nose and adds a playful finishing touch.
Step 14: Chill to Set Decorations
Finally, place your decorated snowman cake pops in the refrigerator so the chocolate decorations can fully harden and hold steady.
How to Serve Snowman Cake Pops Recipe

Garnishes
Sprinkle a dusting of edible glitter or powdered sugar over the cake pops for an extra snowy effect that sparkles under the light. You can also add tiny edible snowflake decorations nearby to boost the winter vibe.
Side Dishes
Serve these delightful cake pops alongside a warm mug of hot cocoa or a cozy cup of spiced tea. The warm drinks perfectly complement the rich sweetness of the pops, creating the ultimate winter treat experience.
Creative Ways to Present
Arrange your snowman cake pops standing upright in crushed peppermint or shredded coconut “snow” inside a decorative box or vase. You can also wrap each pop in clear cellophane tied with a festive ribbon—these make perfect party favors and hostess gifts!
Make Ahead and Storage
Storing Leftovers
Once fully set and decorated, snowman cake pops can be kept in an airtight container in the refrigerator for up to 5 days. This keeps the chocolate crisp and the center moist and delicious.
Freezing
If you want to prepare them well ahead of time, you can freeze the cake pops, wrapped individually in plastic wrap and stored in a sealed container, for up to 2 months. Thaw them in the fridge before serving to maintain freshness and texture.
Reheating
Snowman cake pops are best enjoyed cold or at room temperature, so reheating is not necessary. If desired, simply leave them out for about 15 minutes before serving to take the chill off and enhance flavor nuances.
FAQs
Can I use other types of muffins instead of vanilla?
Absolutely! While vanilla muffins provide a neutral, sweet base, you can experiment with chocolate or spice muffins to add a different flavor twist. Just be mindful of how the flavors blend with cream cheese and white chocolate.
What if I don’t have a food processor for the Oreo crumbs?
No worries—place the Oreos in a sealed plastic bag and crush them with a rolling pin until finely ground. It might take a little more effort, but the results will be just as delicious.
Can I make these cake pops vegan or dairy-free?
Yes, by substituting cream cheese with a vegan alternative and using dairy-free white chocolate, you can adapt the recipe for a vegan or dairy-free diet. Just ensure your replacements melt and bind similarly.
Is it okay to use wooden sticks instead of plastic straws?
Definitely. Wooden sticks or lollipop sticks are actually preferred by many because they offer sturdy support and are easy to handle when dipping and decorating.
How long do these cake pops last once decorated?
Decorated cake pops stored properly in the refrigerator can last up to 5 days. Beyond that, the texture and flavor might begin to diminish, so it’s best to enjoy them fresh.
Final Thoughts
There’s something truly joyful about crafting these snowy little treats that delight both the eyes and taste buds. This Snowman Cake Pops Recipe transforms simple ingredients into a festive celebration of flavor and fun. Whether you’re making them for family, friends, or a cozy solo indulgence, they’re sure to become a cherished classic in your dessert repertoire. So grab those muffins, Oreos, and chocolate, and let the snowman magic begin!
Print
Snowman Cake Pops Recipe
- Total Time: 1 hour 20 minutes
- Yield: 8 servings (16 cake pops)
- Diet: Vegetarian
Description
Delightful and festive Snowman Cake Pops made from crumbled vanilla muffins and Oreo cookies, bound with cream cheese, and coated in creamy white chocolate. Perfect for holiday parties or winter celebrations, these adorable treats are decorated with dark chocolate and gummies to bring a charming snowman to life.
Ingredients
Base Ingredients
- 3/4 cup cream cheese
- 10 vanilla muffins
- 8 Oreo cookies
Coating and Decoration
- 2 1/2 cups white chocolate (approx. 400 grams)
- Dark chocolate (as needed for decoration)
- Gummies or sprinkles for the snowman’s nose
- 8 sticks or straws
Instructions
- Prepare Oreo Crumbs: Place the Oreo cookies in a food processor and pulse until they become fine crumbs. Set aside for later use.
- Crumb the Muffins: In a large bowl, crumble the vanilla muffins into small crumbs using your hands or a fork to ensure they break down evenly.
- Combine Crumbs: Add the processed Oreo crumbs to the crumbled muffin crumbs and mix well.
- Add Cream Cheese: Incorporate the cream cheese into the crumb mixture, mixing thoroughly with your hands until a smooth, homogeneous dough forms that is easy to shape.
- Melt Initial White Chocolate: Melt about a quarter of the white chocolate either in the microwave in short bursts or over a double boiler, stirring constantly to avoid burning.
- Shape Cake Balls: Divide the dough into 16 equal portions and roll each into a ball by hand.
- Assemble Snowman Bodies: Brush the top of the first ball with melted white chocolate, then thread two balls onto each stick or straw to form the snowman’s body.
- Freeze Cake Pops: Place the assembled cake pops on a tray and freeze for at least 1 hour until they are firm and well chilled.
- Melt Remaining White Chocolate: Completely melt the rest of the white chocolate using the microwave or double boiler method, stirring until smooth.
- Dip Cake Pops: Dip each frozen cake pop into the white chocolate, coating all surfaces evenly for a smooth finish.
- Dry Coated Pops: Allow the white chocolate coating to dry and harden completely before proceeding to decoration.
- Decorate with Dark Chocolate: Melt a small amount of dark chocolate and use a piping bag or toothpick to carefully draw the snowman’s eyes, mouth, and buttons on each cake pop.
- Add Nose Decoration: Attach a gummy or sprinkle onto each snowman to serve as its nose.
- Set Decorations: Refrigerate the decorated cake pops so the chocolate decorations fully set and harden for a clean, finished look.
Notes
- Ensure the white chocolate is fully melted and smooth for an even coating on the cake pops.
- Freezing the cake pops before dipping helps the coating stick better and prevents the balls from falling off the sticks.
- Be gentle when threading the cake balls to avoid breaking them apart.
- Use a small piping bag or toothpick for detailed decoration with dark chocolate.
- You can substitute gummies or sprinkles with small candies or colored sugar for the nose decoration based on preference.
- Prep Time: 40 minutes
- Cook Time: 40 minutes
- Category: Dessert
- Method: No-Cook
- Cuisine: American
