If you’re craving a dessert that feels like a warm hug on a chilly day, you have to try this Easy Homemade Apple Crisp with Vanilla Ice Cream Recipe. It’s everything you want in a fall treat—juicy, cinnamon-spiced apples nestled beneath a crunchy oat topping and served with a melting scoop of creamy vanilla ice cream. This dish is not only fabulously tasty but incredibly straightforward to make, making it a perfect dessert to share with family or impress guests without hours of fuss. The combination of tart Granny Smiths and sweet Honeycrisps creates a harmonious balance that pairs beautifully with the rich buttery topping. Plus, adding a drizzle of caramel elevates every bite to pure indulgence. Trust me, this apple crisp quickly becomes a beloved favorite once you taste it!
Ingredients You’ll Need
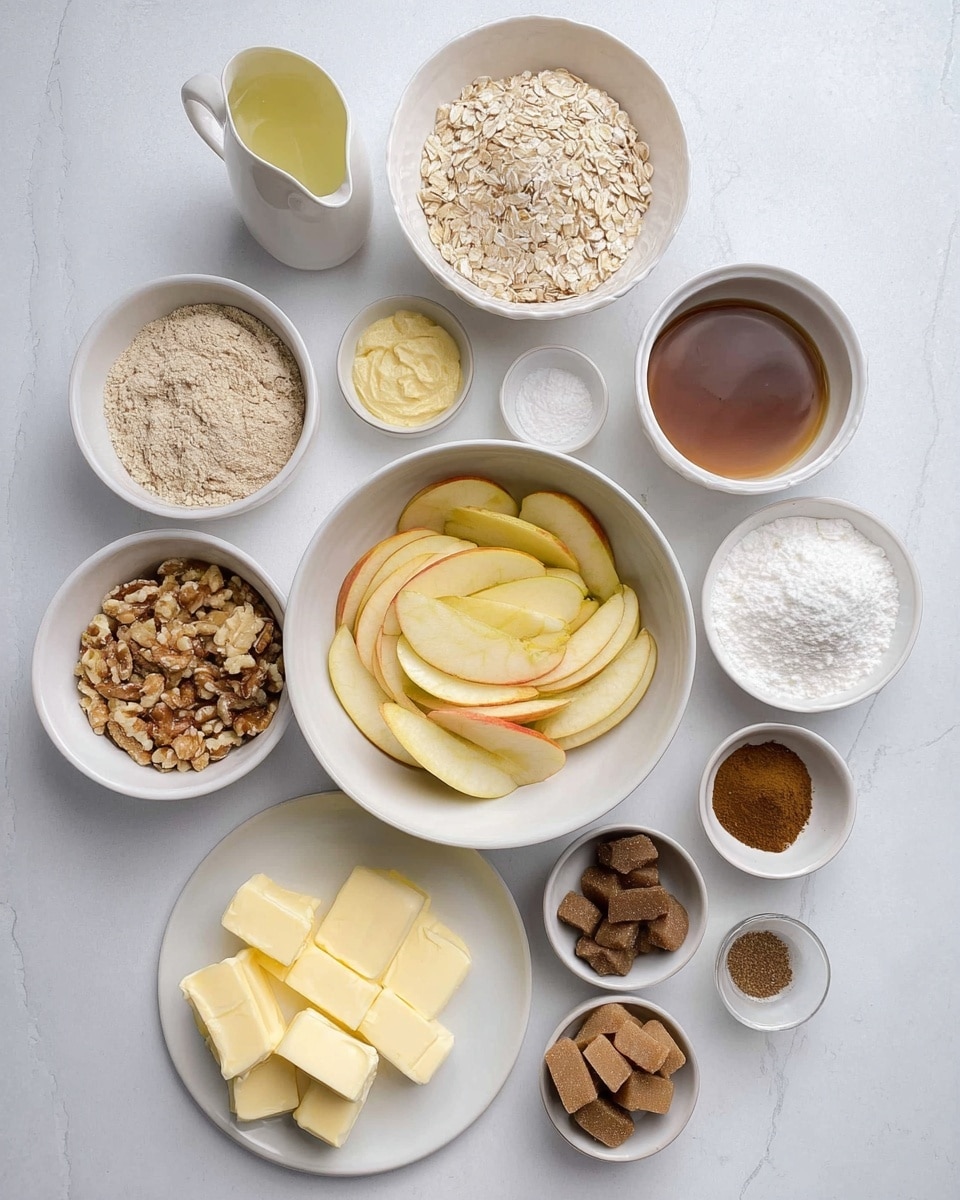
The beauty of this Easy Homemade Apple Crisp with Vanilla Ice Cream Recipe is in how simple yet essential each ingredient is. Every element contributes its own magic, from the tartness and sweetness of the apples to the hearty oats in the crumbly topping. Here’s what you’ll need to bring this classic comfort dessert to life:
- 6 medium apples (mix of Granny Smith and Honeycrisp): Combining tart and sweet apples gives your crisp the perfect depth of flavor and texture.
- 1/4 cup granulated sugar: Adds just enough sweetness to enhance the natural fruit flavors without overpowering.
- 1/4 cup light brown sugar: Brings a gentle caramel-like note to the apple filling.
- 1 tsp ground cinnamon: The quintessential spice that warms up the entire dish.
- 1/2 tsp ground nutmeg: Adds a subtle layer of cozy spice complexity.
- 1/4 tsp ground allspice: Deepens the spiced profile with a hint of warmth.
- 2 tbsp fresh lemon juice: Keeps the apples bright, fresh, and prevents browning.
- 1 tbsp cornstarch: Essential for thickening the apple juices so the filling isn’t runny.
- 1 cup old-fashioned oats: Creates a satisfyingly crunchy topping full of rustic charm.
- 1/2 cup all-purpose flour: Holds the topping together with a tender crumb.
- 1/2 cup light brown sugar, packed: Adds sweetness and buttery richness to the crisp layer.
- 1/4 cup granulated sugar: Provides balance and slight crunch in the topping.
- 1/2 tsp ground cinnamon: A hint more spice that ties the topping to the filling flavors.
- 1/4 tsp salt: Enhances all the flavors and cuts sweetness just right.
- 1/2 cup unsalted butter, cold and cubed: The secret behind that irresistible, crumbly, golden topping.
- 1/2 cup chopped pecans or walnuts (optional): Adds texture and a lovely nutty flavor if you’re feeling a bit fancy.
- Vanilla ice cream: Creamy and cool, the perfect contrast to the warm apple crisp.
- Caramel sauce: Optional, but highly recommended for an extra decadent finish.
How to Make Easy Homemade Apple Crisp with Vanilla Ice Cream Recipe
Step 1: Prepare the Oven and Baking Dish
Start by preheating your oven to 350°F (175°C). Lightly grease a 9×9-inch baking dish or something similar in size to keep your apple crisp from sticking and to help the edges brown nicely. Preparing ahead sets you up for a smooth baking process.
Step 2: Toss the Apples and Spices
In a large bowl, combine your peeled, cored, and thinly sliced apples with granulated sugar, light brown sugar, cinnamon, nutmeg, allspice, fresh lemon juice, and cornstarch. Toss everything together until the apples are coated evenly. The lemon juice keeps the apples bright and the cornstarch thickens the filling as it bakes, making sure every bite is juicy without being soggy.
Step 3: Layer the Apples
Transfer the spiced apple mixture into your prepared baking dish and spread it out evenly. This even layer ensures uniform baking so you get tender, flavorful apples in every scoop.
Step 4: Make the Crisp Topping
In a medium bowl, mix together the oats, all-purpose flour, light brown sugar, granulated sugar, ground cinnamon, and salt. Then add the cold, cubed butter. Using a pastry cutter or your fingers, work the butter into the dry ingredients until the mixture resembles coarse crumbs. If you’re adding chopped nuts for a bit of crunch and nuttiness, now’s the time to stir them in. This cool butter technique is key to getting that perfect crumbly texture on top.
Step 5: Assemble and Bake
Sprinkle your oat topping evenly over the apple layer in the baking dish. Pop it into the oven and bake for about 35 to 40 minutes until the topping turns a gorgeous golden brown and the apples are tender when pierced with a fork. That bubbly, caramelized aroma filling your kitchen? That means it’s ready.
Step 6: Let It Rest Before Serving
Once baked, let your apple crisp cool for 5 to 10 minutes. This little rest lets the filling thicken slightly, so it’s perfectly saucy but not runny when you dig in.
How to Serve Easy Homemade Apple Crisp with Vanilla Ice Cream Recipe
Garnishes
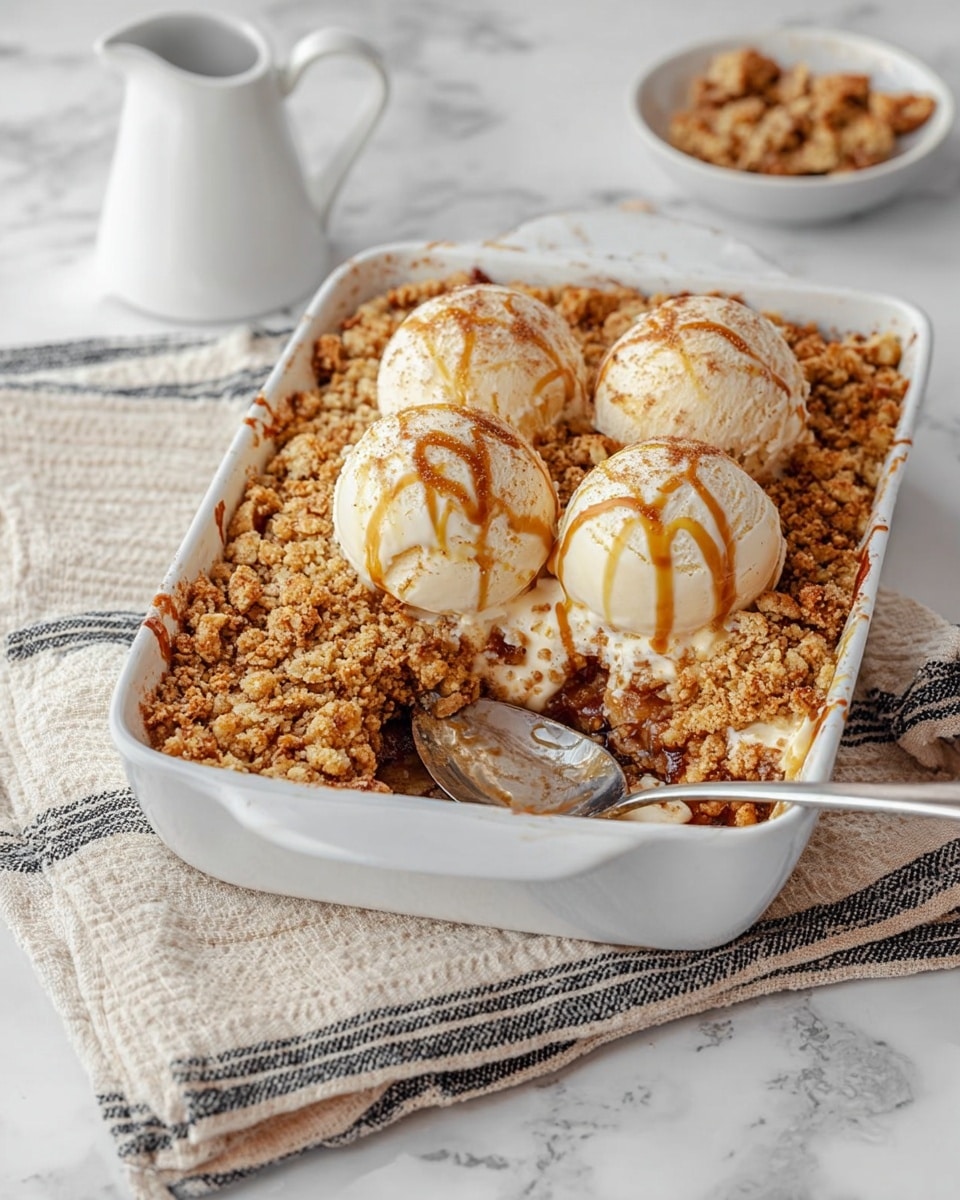
For that classic finish, scoop warm apple crisp into bowls and top each serving with a generous dollop of creamy vanilla ice cream. The contrast of hot and cold flavors is utterly dreamy and melts into a luscious sauce. If you’re feeling extra indulgent, drizzle some caramel sauce over the top and sprinkle a few chopped nuts for added texture and flavor bursts. Simple yet showstopping!
Side Dishes
This Easy Homemade Apple Crisp with Vanilla Ice Cream Recipe shines as a dessert star, but it also pairs beautifully with a steaming cup of coffee, chai tea, or even mulled wine for those special occasions. For a cozy family dinner, serve alongside savory mains like roast chicken or pork – the sweet and spiced elements play off savory meats perfectly.
Creative Ways to Present
Want to dress up your apple crisp for a party? Serve it in individual ramekins for personal portions or layer the filling and topping in clear glass jars to show off the gorgeous textures and colors. You can even add a sprinkle of crunchy granola or toasted coconut on top of the ice cream for an extra special touch that will wow guests.
Make Ahead and Storage
Storing Leftovers
If by chance you have leftovers (though it’s rare!), cover the apple crisp tightly with foil or plastic wrap and store in the refrigerator for up to 3 to 4 days. The flavors actually deepen with time, making it just as delicious the next day.
Freezing
This dessert freezes wonderfully. After baking and cooling completely, wrap it well in plastic wrap and aluminum foil, then freeze for up to 2 months. To enjoy later, thaw overnight in the fridge and reheat gently in the oven to bring back that fresh-baked magic.
Reheating
Reheat your apple crisp in a preheated oven at 350°F (175°C) for about 15 to 20 minutes until warmed through. This helps keep the topping crispy. For a super quick fix, microwave individual servings, but you might lose a bit of that crunch. Don’t forget to add a fresh scoop of vanilla ice cream each time for maximum deliciousness!
FAQs
Can I use other types of apples in this recipe?
Absolutely! While a mix of Granny Smith and Honeycrisp is ideal for balancing tartness and sweetness, feel free to use any apples you enjoy. Just keep in mind that some apples are softer and cook faster, so slice them evenly to ensure they all cook at the same rate.
Is it possible to make the apple crisp gluten-free?
Yes! Substitute the all-purpose flour with a gluten-free flour blend, and make sure your oats are labeled gluten-free. The texture might vary slightly but the flavors will still be fantastic.
Can I prepare this apple crisp ahead of time before baking?
Definitely! You can assemble the entire dish and keep it covered in the fridge for up to 24 hours before baking. Just add an extra few minutes to the baking time if it’s chilled straight from the fridge.
What if I don’t have vanilla ice cream on hand?
No worries! You can serve the apple crisp with whipped cream, a dollop of yogurt, or even custard. Each adds a creamy contrast that complements the warm, spiced apples beautifully.
Why is the lemon juice important in the apple filling?
Lemon juice prevents the apples from browning, keeping them looking fresh and bright. It also adds a subtle zing that balances the sweetness and enhances the overall flavor.
Final Thoughts
There’s something so wonderfully satisfying about making an Easy Homemade Apple Crisp with Vanilla Ice Cream Recipe that feels both nostalgic and absolutely delicious. It’s a dessert that brings warmth to any table, no matter the occasion, and is surprisingly effortless to whip up. Whether you’re serving it for a casual weeknight treat or a special celebration, this recipe is sure to become a cherished classic in your home. So, gather your apples, dust off your baking dish, and get ready for some cozy, comforting bites that melt hearts and taste buds alike!
Print
Easy Homemade Apple Crisp with Vanilla Ice Cream Recipe
- Total Time: 55 minutes
- Yield: 6 servings
- Diet: Vegetarian
Description
This easy homemade apple crisp recipe combines tender, spiced apples baked under a crunchy oat and brown sugar topping, served warm with creamy vanilla ice cream and an optional drizzle of caramel sauce. Perfectly balancing sweet and tart flavors, it’s a cozy, comforting dessert that’s simple to make and delightful for any occasion.
Ingredients
For the Filling:
- 6 medium apples (mix of Granny Smith and Honeycrisp), peeled, cored, and thinly sliced (about 900 g total)
- 1/4 cup granulated sugar (50 g)
- 1/4 cup light brown sugar (50 g)
- 1 tsp ground cinnamon (2 g)
- 1/2 tsp ground nutmeg (1 g)
- 1/4 tsp ground allspice (0.5 g)
- 2 tbsp fresh lemon juice (30 ml)
- 1 tbsp cornstarch (8 g)
For the Topping:
- 1 cup old-fashioned oats (100 g)
- 1/2 cup all-purpose flour (65 g)
- 1/2 cup light brown sugar, packed (100 g)
- 1/4 cup granulated sugar (50 g)
- 1/2 tsp ground cinnamon (2 g)
- 1/4 tsp salt (1.5 g)
- 1/2 cup (1 stick) unsalted butter, cold and cubed (115 g)
- 1/2 cup chopped pecans or walnuts (optional) (60 g)
To Serve:
- Vanilla ice cream
- Caramel sauce
Instructions
- Preheat oven: Preheat your oven to 350°F (175°C) and lightly grease a 9×9-inch baking dish or similar oven-safe dish to prepare for baking the apple crisp.
- Prepare apple filling: In a large bowl, combine the sliced apples with granulated sugar, brown sugar, cinnamon, nutmeg, allspice, lemon juice, and cornstarch. Toss thoroughly until the apples are evenly coated with the mixture, ensuring a balanced flavor in every bite.
- Transfer filling: Spread the coated apple mixture evenly into the prepared baking dish to create an even layer for consistent cooking.
- Make topping mix: In a medium bowl, combine oats, all-purpose flour, brown sugar, granulated sugar, cinnamon, and salt, mixing until well incorporated.
- Add butter: Add the cold, cubed unsalted butter to the topping mixture. Use a pastry cutter or your fingers to work the butter into the dry ingredients until the mixture resembles coarse crumbs, which will become the crisp topping texture.
- Incorporate nuts: Stir in the chopped pecans or walnuts if using to add extra crunch and flavor to the topping.
- Add topping: Sprinkle the topping evenly over the apple mixture in the baking dish, covering the apples thoroughly for a golden crust.
- Bake: Bake the assembled dish in the preheated oven for 35–40 minutes, until the topping is golden brown and the apples are tender when pierced with a fork, indicating doneness.
- Cool slightly: Remove the dish from the oven and allow it to cool for 5–10 minutes. This rest lets the juices thicken and settle, preventing a soggy texture when serving.
- Serve: Scoop warm apple crisp into bowls and top each serving with a generous scoop of vanilla ice cream. Drizzle caramel sauce on top if desired for an extra indulgent touch, and enjoy the contrast of warm and cold textures.
Notes
- Use a mix of tart Granny Smith and sweet Honeycrisp apples for the best flavor balance.
- Lemon juice prevents apples from browning and adds a bright zing.
- Keep butter cold while mixing the topping to achieve a crumbly texture.
- Chopped nuts in the topping are optional but add delicious crunch.
- Allow the apple crisp to cool before serving to let juices settle.
- Serve warm with vanilla ice cream and optional caramel sauce for a classic combo.
- Leftovers can be stored covered in the fridge for 3-4 days and reheated in the oven or microwave.
- For crispier topping on reheating, use the oven instead of the microwave.
- Prep Time: 15 minutes
- Cook Time: 40 minutes
- Category: Desserts
- Method: Baking
- Cuisine: American


