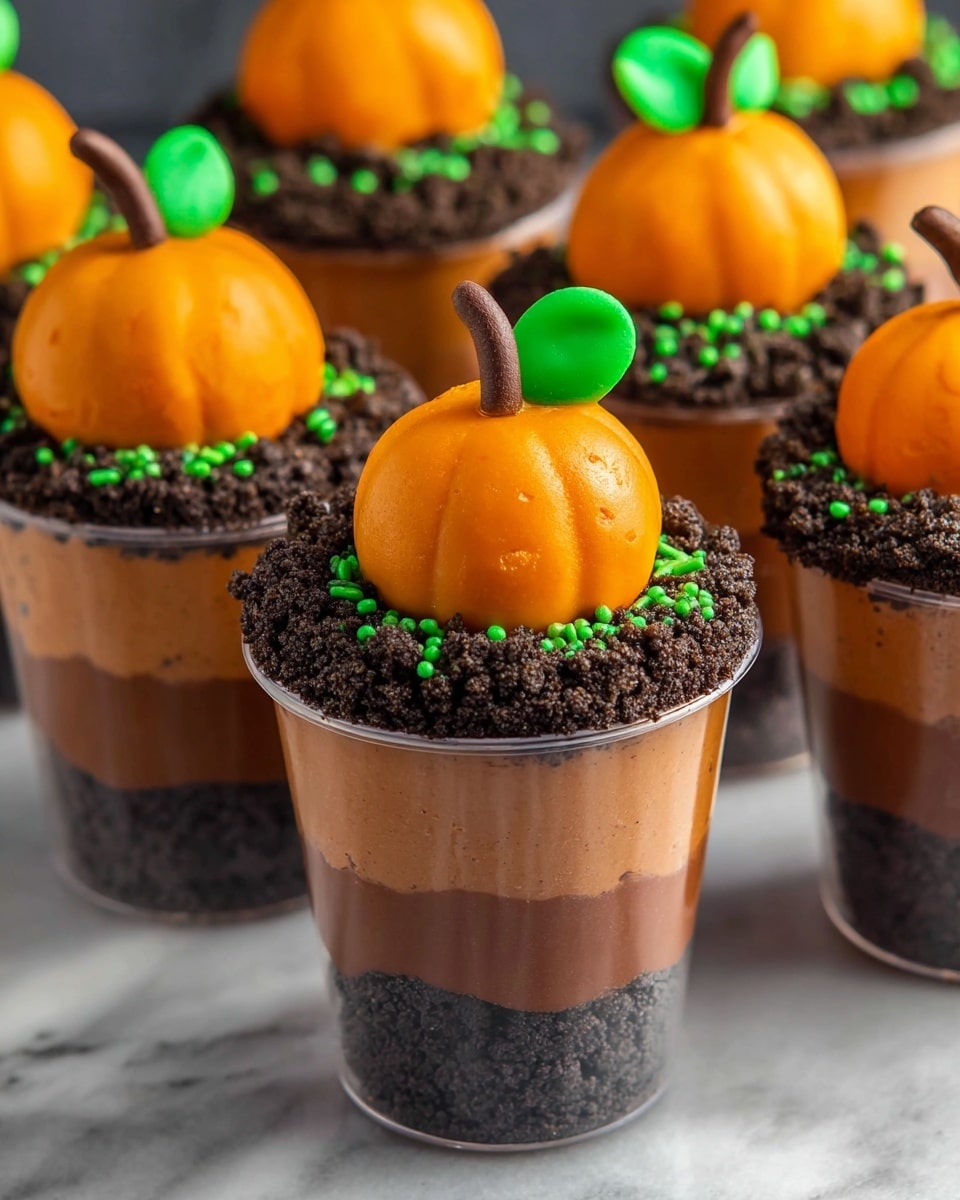
If you’re looking for a Halloween dessert that’s as fun to make as it is to eat, you’ve just found it. This Pumpkin Dirt Cups Recipe brings together creamy chocolate pudding, crumbly Oreos, and adorable pumpkin-shaped treats that will wow your family and friends. It’s a playful twist on the classic dirt cup, perfect for fall celebrations or anytime you want to bring a little festive cheer to the table.
Ingredients You’ll Need
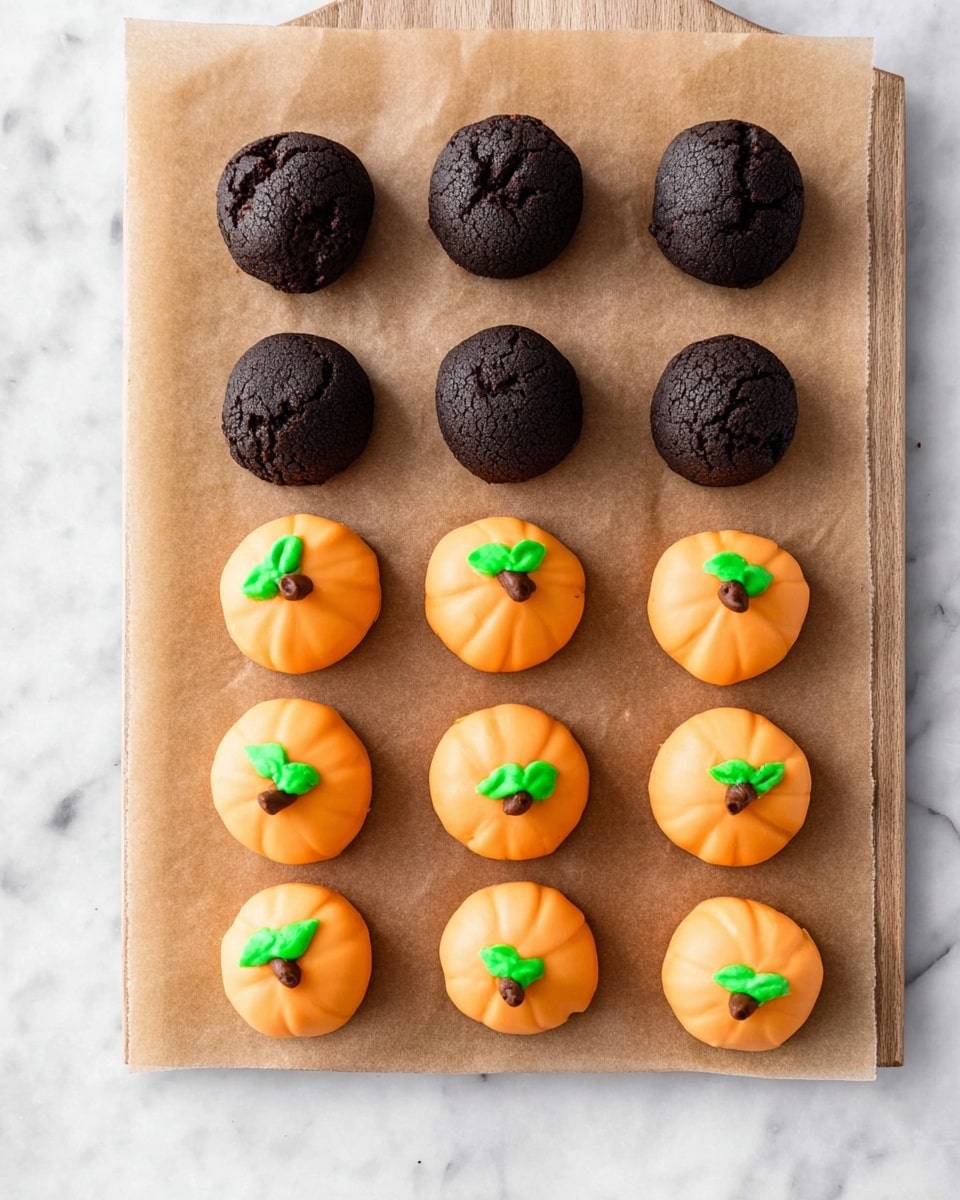
Gathering the right ingredients is half the joy of making this Pumpkin Dirt Cups Recipe. Each item plays an important role, from the crumbly Oreos that create the “dirt” to the bright orange candy melts that turn Oreo balls into charming pumpkins. These simple but essential ingredients will make your final creation both delicious and visually delightful.
- Oreos (2 18-ounce family-size packages): These provide the perfect crunchy, chocolaty base when pulverized into crumbs or mixed into creamy balls.
- Cream cheese (8-ounce block, softened): Adds richness and helps bind the Oreo crumbs into dough-like balls.
- Orange candy melts (1 ½ cups): These melt into a smooth coating that transforms Oreo balls into shiny pumpkins.
- Pretzel sticks (¼ cup, cut in half): Used to create the realistic pumpkin stems for a fun, decorative touch.
- Green M&Ms (¼ cup, cut in half): Serve as tiny leaves next to the stem, adding a pop of color.
- Chocolate pudding (2 cups, prepared): The creamy layer that contrasts beautifully with the crunchy Oreo crumbles.
- Gummy worms (1 cup): Playful and squirmy, they’re the perfect “worm in dirt” surprise in each cup.
- Green sprinkles (3 tablespoons): Add a final touch of “grass” to your dessert cups, making them extra special.
How to Make Pumpkin Dirt Cups Recipe
Step 1: Pulverize and Mix the First Package of Oreos
Start by pulverizing one package of Oreos in a food processor until they reach a sandy texture, about one minute. Transfer the crumbs to a bowl and mix them thoroughly with the softened cream cheese. The goal is to create a dough-like mixture that’s easy to shape—if it gets too soft, just chill it briefly in the fridge.
Step 2: Shape Oreo-Cream Cheese Balls
Roll the mixture into smooth, 2-inch balls on a nonstick surface. These little spheres will become the pumpkins. For added realism, gently press vertical lines into each ball with a toothpick to mimic pumpkin grooves. Set the balls in the fridge to firm up for at least an hour.
Step 3: Coat the Balls in Orange Candy Melts
Melt the orange candy melts according to the package instructions. Using a fork, dip each chilled Oreo ball into the melted candy, coating it completely. Let the excess drip off and place the coated balls on your nonstick surface to set.
Step 4: Decorate with Pretzel Stems and M&M Leaves
While the candy coating is still wet, stick a half pretzel at the top of each ball to serve as a pumpkin stem. Add half a green M&M next to the stem as the pumpkin leaf. Once decorated, put the pumpkins back into the fridge to harden while you prepare the pudding cups.
Step 5: Prepare the Layers of Oreo Crumbles and Pudding
Use the second package of Oreos and pulverize it until fine crumbs form. Into each clear snack cup, layer a spoonful of Oreo crumbs, then a spoonful of chocolate pudding, inserting gummy worms as you go for that fun “worms in dirt” effect. Repeat these layers until the cups are filled, finishing with a generous sprinkle of Oreo crumbs on top.
Step 6: Assemble and Garnish
Top each dirt cup with one of your charming pumpkin Oreo balls and sprinkle some green sprinkles over everything to create the look of grass around your pumpkins. Chill before serving to let all the flavors meld into one delightful dessert.
How to Serve Pumpkin Dirt Cups Recipe
Garnishes
Adding finishing touches to these Pumpkin Dirt Cups turns a simple dessert into a showstopper. The green sprinkles add the perfect burst of color, mimicking grass around your pumpkins. You can also hide a few extra gummy worms peeking out for a playful surprise with each bite.
Side Dishes
This dessert pairs beautifully with light, fresh sides like crisp apple slices or a simple pumpkin spice latte. The rich, creamy pudding and chocolatey Oreos balance perfectly with the natural sweetness and crunch of fruit or the warmth of a fall-inspired drink.
Creative Ways to Present
For a party, consider serving these dirt cups in little mason jars or clear mini terracotta pots for a rustic feel. Tuck a tiny gardening tool or themed Halloween toppers on each cup for even more fun. These unique presentations instantly elevate your Pumpkin Dirt Cups Recipe and get everyone excited to dig in.
Make Ahead and Storage
Storing Leftovers
Keep any leftovers covered tightly in the fridge. These cups hold up well for up to three days, making them a perfect make-ahead treat for busy days or gatherings.
Freezing
While the pumpkin Oreo balls can be frozen before coating, the pudding cups themselves don’t freeze well because the texture of the pudding changes. For best results, freeze the Oreo balls separately if you want to prepare in advance.
Reheating
There’s no need to reheat Pumpkin Dirt Cups Recipe since they’re best enjoyed chilled. Simply let frozen Oreo balls thaw in the refrigerator before decorating and assembling the cups.
FAQs
Can I use regular cream cheese instead of softened?
Yes, but it’s best to soften the cream cheese to room temperature first so it blends smoothly with the Oreo crumbs for a perfect dough consistency.
Are there alternatives to orange candy melts?
You can use orange-tinted white chocolate or colored candy melts from other brands to coat the pumpkin balls. Just make sure they melt smoothly and harden properly.
Can I substitute the gummy worms with something else?
Definitely! You can use gummy spiders, candy corn, or even chocolate chips for a different take, depending on the occasion or your personal taste.
Is it necessary to use pretzels and M&Ms on the pumpkins?
They add a cute and realistic touch, but if you don’t have them, you can skip or substitute with other small candies or edible decorations.
How far in advance can I prepare these dirt cups?
You can prepare the pumpkin Oreo balls and pudding layers a day ahead and assemble the cups just before serving to keep everything fresh and visually appealing.
Final Thoughts
You’re going to love making and sharing the Pumpkin Dirt Cups Recipe because it’s as charming as it is delicious. With its mix of textures and that perfect seasonal touch, it’s guaranteed to become a favorite tradition for your fall celebrations. Give it a try and watch smiles grow with every bite!
Print
Pumpkin Dirt Cups Recipe
- Total Time: 1 hour 25 minutes
- Yield: 12 servings
Description
Delight in these festive Pumpkin Dirt Cups, combining creamy chocolate pudding, crumbled Oreos, and adorable pumpkin-shaped Oreo cream cheese balls coated in orange candy melts. Perfect for Halloween or autumn gatherings, they are layered with gummy worms and topped with green sprinkles for an extra playful touch.
Ingredients
Oreo Pumpkin Balls
- 2 (18-ounce) family-size packages of Oreos, divided
- 1 (8-ounce) block cream cheese, softened
- 1½ cups orange candy melts
- ¼ cup pretzel sticks (cut in half)
- ¼ cup green M&Ms (cut in half)
- 3 Tablespoons green sprinkles
Dirt Cups
- 2 cups chocolate pudding, prepared
- 1 cup gummy worms
Instructions
- Pulverize the Oreos: In a food processor, pulverize one package of Oreos for about 1 minute until they reach a sandy texture suitable for combining with cream cheese.
- Make the Oreo cream cheese mixture: In a large bowl, use a rubber spatula to mix the pulverized Oreos with the softened cream cheese until you achieve a dough-like consistency. If too soft, chill in the fridge for 10 minutes to firm up.
- Roll into balls: Shape the Oreo cream cheese mixture into smooth 2-inch balls and place them on a flat nonstick surface such as parchment paper.
- Create pumpkin grooves (optional): Use a toothpick to press vertical lines into each ball, mimicking pumpkin grooves. Chill the balls in the fridge for at least 1 hour to firm.
- Melt candy melts and coat balls: Melt the orange candy melts according to package instructions. Using a fork, dip each Oreo ball into the melted candy to coat evenly, allowing excess to drip off. Return to the nonstick surface.
- Add pumpkin stems and leaves: Immediately insert a half pretzel stick into the top of each coated ball to form a stem and press a halved green M&M nearby to resemble a leaf. Refrigerate to set and harden.
- Prepare Oreo crumbs for cups: Pulverize the second package of Oreos until sandy in texture. Place in a bowl for layering.
- Layer the dirt cups: In 5.5 to 6-ounce clear snack cups, add a spoonful of Oreo crumbs, then a gummy worm, followed by a spoonful of chocolate pudding. Alternate layers of Oreo crumbs, gummy worms, and pudding until cups are nearly full.
- Top and garnish: Finish each cup with a layer of Oreo crumbles. Top with one pumpkin Oreo ball and sprinkle green sprinkles over the top. Serve chilled.
Notes
- For best results, chill the Oreo balls thoroughly before coating to prevent melting the candy melts.
- You can use store-bought chocolate pudding or make homemade pudding for a fresher taste.
- Gummy worms add a fun, spooky element perfect for Halloween-themed parties.
- Use a toothpick for creating grooves carefully to avoid breaking the balls.
- Store assembled dirt cups refrigerated and consume within 2 days for optimal freshness.
- Prep Time: 35 minutes
- Cook Time: 0 minutes
- Category: Dessert
- Method: No-Cook
- Cuisine: American
