“`html
There is something truly magical about the Caramel Apple Cheesecake in Jars Recipe that combines the rich creaminess of cheesecake with the crisp, tart punch of fresh apples and the irresistible sweetness of caramel. This dessert is a delightful blend of textures and flavors, all perfectly portioned in cute little jars, making it as charming to serve as it is to eat. Whether you’re celebrating a special occasion or just craving a cozy treat, this recipe offers a wonderfully simple yet indulgent way to enjoy classic fall flavors anytime you want.
Ingredients You’ll Need
Gathering your ingredients is the first fun step toward creating this classic, crowd-pleasing treat. Each component plays its own special role, ensuring every bite bursts with balanced sweetness, creamy texture, and that signature autumn vibe.
- Graham crackers: These form the crunchy, buttery crust that grounds the dessert in familiar comfort.
- Brown sugar: Adds a deep, caramel-like sweetness that complements the crust and cheesecake perfectly.
- Unsalted butter: Melted to bind the crust ingredients and lend richness without overpowering.
- Cream cheese: The star of the cheesecake, softened to ensure a silky, smooth filling.
- Sugar: Sweetens the cream cheese filling just right, balancing tart apple notes.
- Vanilla extract: Infuses the batter with warm, aromatic flavor to elevate every spoonful.
- Frozen whipped topping: Folded in for an airy, light consistency that makes the cheesecake almost fluffy.
- Granny Smith apples: Their tart crunch cuts through the richness and brightens the dessert.
- Caramel sauce: The luscious drizzle that ties everything together with sticky, sweet decadence.
- Mini M&Ms: For a playful pop of color and chocolate that kids and adults love alike.
- Mini chocolate chips: These add little bursts of chocolate flavor and texture contrast.
How to Make Caramel Apple Cheesecake in Jars Recipe
Step 1: Prepare the Crust
Start by crumbling your graham crackers finely—either in a food processor or by smashing them with a rolling pin inside a sealed bag. Next, gently melt the butter and combine it with the crumbs and brown sugar until the mixture looks like wet sand. This crumbly base is essential as it creates a perfect crunchy texture that holds up beautifully in the jars. Press this mixture firmly into the bottoms of six 8-ounce jars to form an even crust layer.
Step 2: Make the Cheesecake Filling
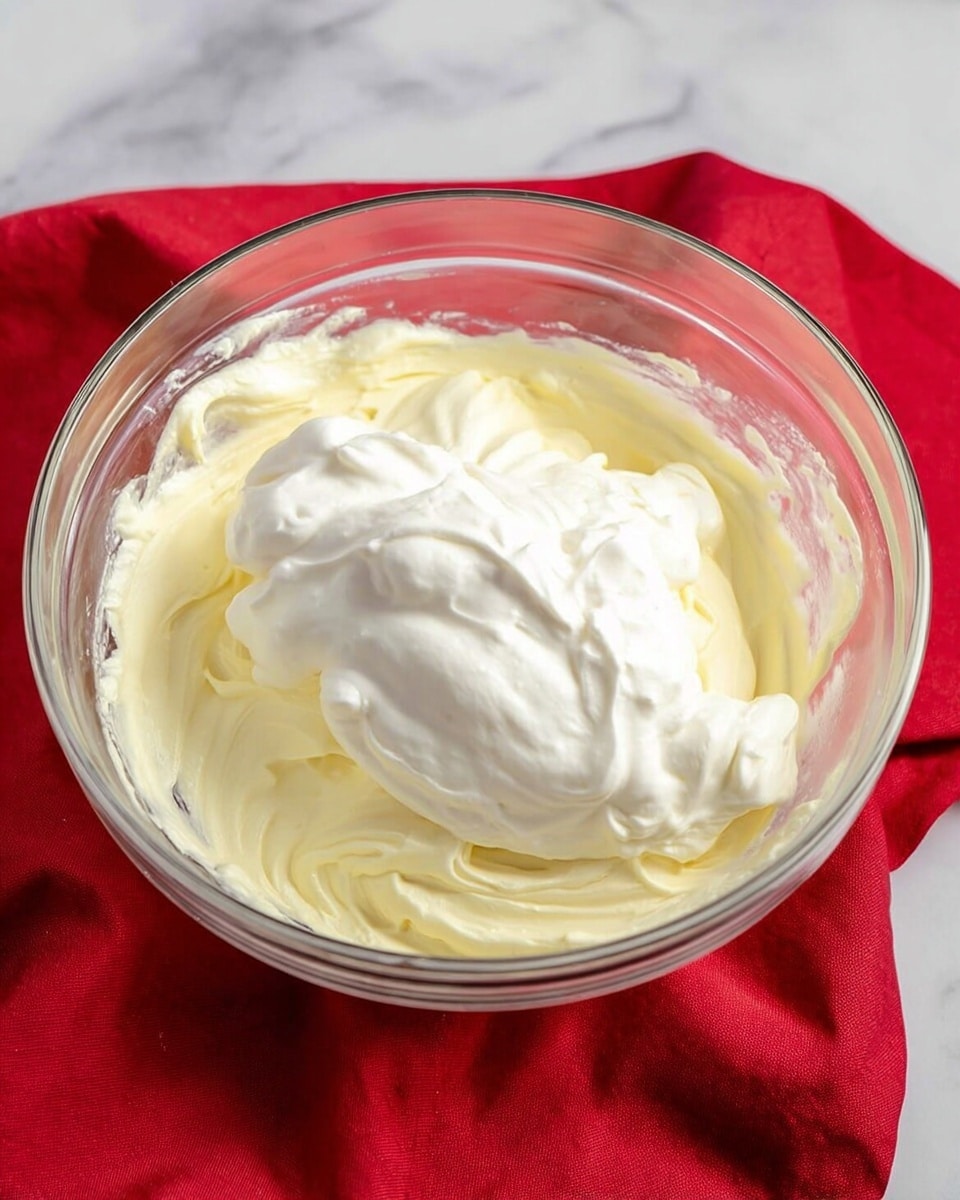
Using an electric mixer, beat together the softened cream cheese, sugar, and vanilla extract until the mixture is utterly smooth and creamy with no lumps. This step is crucial for that luscious texture we all crave in cheesecake. Then, gently fold in the thawed whipped topping—this adds airiness and makes the filling delightfully light, keeping the jars from feeling too heavy or dense.
Step 3: Assemble the Jars
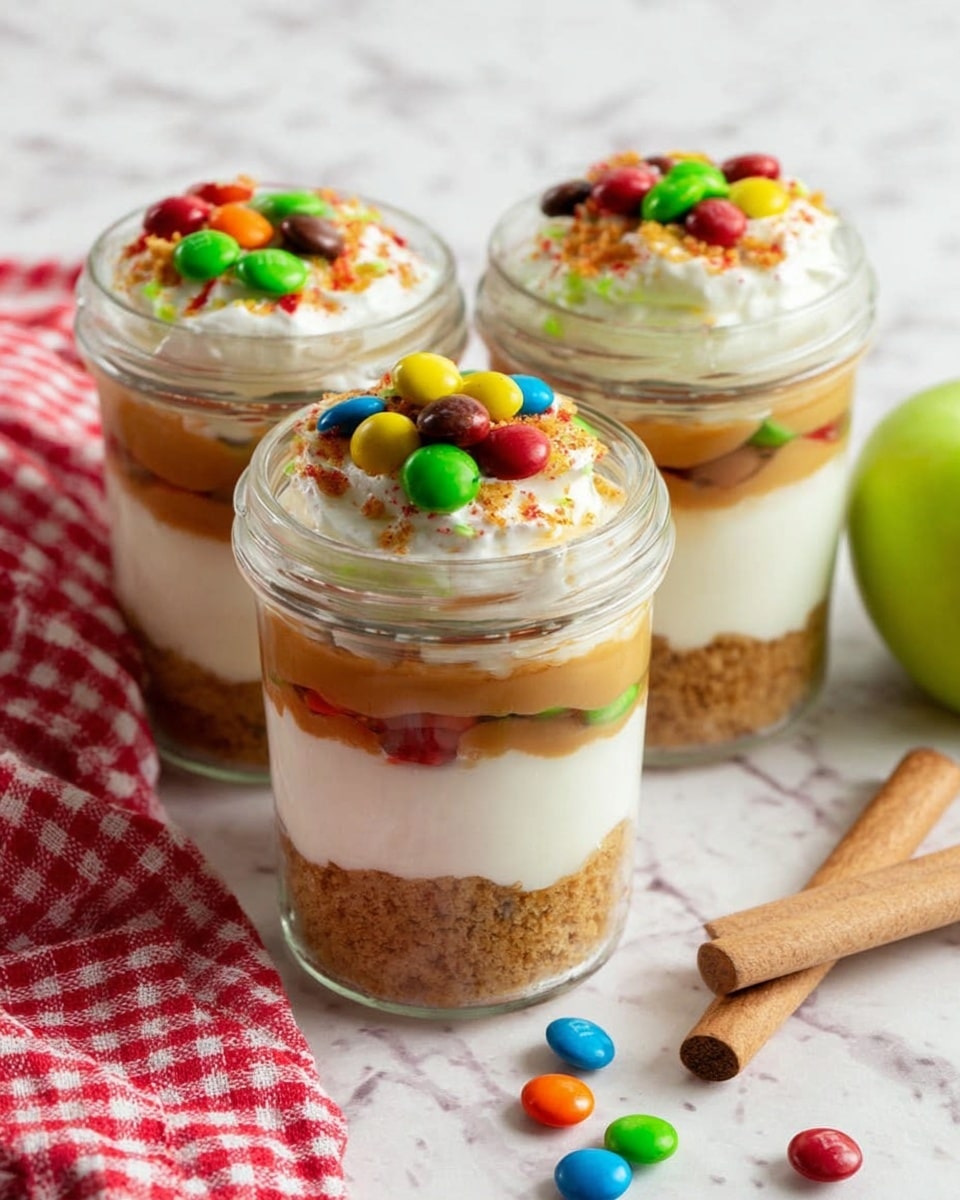
Spoon the cheesecake batter into each jar, filling them halfway. Then add a generous layer of caramel sauce right on top, which brings that rich, gooey sweetness that makes you swoon. Add another cheesecake layer, leaving enough room at the top so you can pile on some fun toppings once chilled. This layering is what makes this Caramel Apple Cheesecake in Jars Recipe so visually appealing and tasty.
Step 4: Chill
Seal your jars and place them in the refrigerator to chill for at least four hours. This step is non-negotiable because it allows the cheesecake to set perfectly, while the caramel sauce melds with the creamy filling creating those irresistibly dreamy bites. Patience here truly rewards you.
Step 5: Add Toppings and Serve
When you’re ready to enjoy, top each jar with the diced tart Granny Smith apples, mini M&Ms, and mini chocolate chips. Finish it off with another drizzle of caramel sauce to add that extra layer of sweetness and visual sparkle. These toppings not only boost flavor complexity but make the jars look festive and inviting.
How to Serve Caramel Apple Cheesecake in Jars Recipe
Garnishes
Feel free to get creative with your garnishes! Besides the diced apples, mini M&Ms, and chocolate chips, try toasted pecans or a light dusting of cinnamon powder to echo those cozy fall vibes. A sprig of fresh mint can even add a surprising burst of freshness that pairs beautifully with the caramel notes.
Side Dishes
This dessert shines on its own but pairs beautifully with a simple cup of hot coffee or a spiced chai latte. If you’re hosting a dessert spread, consider serving alongside a crisp apple cider or a glass of creamy vanilla milkshake to balance the richness of the cheesecake jars.
Creative Ways to Present
Serving your Caramel Apple Cheesecake in Jars Recipe in clear jars brings a lovely rustic charm, perfect for casual dinners or autumn gatherings. You can also tie a pretty ribbon around the jar neck and add a small wooden spoon for a gift-ready presentation. For parties, place jars on a wooden board with scattered apple slices and caramel drizzle for an inviting dessert table display.
Make Ahead and Storage
Storing Leftovers
These cheesecake jars keep beautifully in the refrigerator for up to 3 days. Make sure the lids are tightly sealed to prevent them from absorbing any fridge odors, and the crust stays firm. When you’re ready to eat, just grab a jar and enjoy directly from the fridge for a refreshing, chilled dessert experience.
Freezing
If you want to make a batch ahead and freeze, these jars freeze quite well. Just be mindful that the texture of the apples may soften after thawing, so it’s best to add fresh apples when serving. Freeze up to 1 month, then thaw overnight in the fridge before enjoying.
Reheating
This cheesecake is best served cold, so reheating is not recommended. However, if you prefer a slightly softer texture, let the jar sit at room temperature for about 15-20 minutes before digging in. This helps the caramel soften just enough without melting the creamy cheesecake base.
FAQs
Can I use fresh whipped cream instead of frozen whipped topping?
Absolutely! Freshly whipped cream works wonderfully and adds a lovely homemade touch. Just fold it gently to keep the airy texture intact, similar to the frozen whipped topping.
What type of apples works best in this recipe?
Granny Smith apples are preferred for their tartness and firm texture which contrast nicely with the sweet caramel and creamy cheesecake. Other crisp apples like Honeycrisp or Braeburn can also work well.
Is it possible to make this recipe dairy-free?
Yes, but you’ll need to substitute the cream cheese and butter with dairy-free versions and choose a dairy-free whipped topping. Keep in mind the texture might vary slightly but it will still be delicious!
Can I prepare this dessert in larger pans instead of jars?
Definitely! You can use a small baking dish or individual cups, just layer the ingredients similarly. Jars make for great portion control and presentation, but the flavors hold up beautifully in any container.
How long does it take to chill properly?
Chilling for at least four hours is ideal to let the cheesecake set and flavors meld, but overnight chilling makes the texture even better and the taste richer.
Final Thoughts
Trust me, once you try this Caramel Apple Cheesecake in Jars Recipe, it will quickly become one of your go-to desserts to impress friends and family while keeping things simple and fun in the kitchen. It’s perfect for all seasons but especially wonderful when you crave that nostalgic fall feeling wrapped up in a portable, adorable little jar. Give it a whirl—you’ll love how every spoonful feels like a cozy celebration!
“`
Print
Caramel Apple Cheesecake in Jars Recipe
- Total Time: 4 hours 20 minutes
- Yield: 6 servings
Description
This Caramel Cheesecake recipe features a creamy, no-bake cheesecake layered in individual jars with a graham cracker crust, sweet caramel sauce, and topped with diced Granny Smith apples, mini M&Ms, and mini chocolate chips. Perfect for a delightful dessert that requires minimal baking and chilling time.
Ingredients
Crust
- 6 graham crackers
- 1/4 cup brown sugar
- 1/3 cup unsalted butter (melted)
Cheesecake Filling
- 2 8-ounce blocks cream cheese (softened)
- 1/3 cup sugar
- 1 teaspoon vanilla extract
- 8 ounces frozen whipped topping (thawed)
Toppings
- 2 Granny Smith apples (diced)
- Caramel sauce (quantity as desired)
- Mini M&Ms (quantity as desired)
- Mini chocolate chips (quantity as desired)
Instructions
- Prepare the crust: Crumble the graham crackers using a food processor or crush them manually with a rolling pin until fine crumbs are achieved.
- Mix crust ingredients: Melt the butter, then combine it with the graham cracker crumbs and brown sugar, stirring until the mixture resembles wet sand. Press this mixture firmly into the bottoms of six 8-ounce jars to form the crust layer.
- Make cheesecake batter: In a mixing bowl, beat the softened cream cheese, sugar, and vanilla extract with an electric mixer until the mixture is smooth and creamy.
- Fold in whipped topping: Gently fold the thawed frozen whipped topping into the cream cheese mixture until just combined, preserving the light texture.
- Fill jars with batter: Spoon the cheesecake batter into each jar, filling them halfway.
- Add caramel layer: Spoon a generous layer of caramel sauce on top of the cheesecake batter in each jar.
- Add second cheesecake layer: Add another layer of cheesecake batter on top of the caramel, leaving some space at the top of each jar for the toppings.
- Chill the jars: Place the jars in the refrigerator and chill for at least four hours to allow the cheesecake to set and flavors to meld.
- Add final toppings and serve: Just before serving, top each jar with diced Granny Smith apples, mini M&Ms, and mini chocolate chips. Drizzle additional caramel sauce over the top as desired for extra sweetness.
Notes
- Ensure the cream cheese is softened for a smoother batter.
- Use thawed whipped topping to maintain the light texture in the cheesecake filling.
- Chilling time of at least four hours is crucial for the cheesecake layers to firm up properly.
- Feel free to customize the toppings with your favorite candies or nuts.
- This recipe is perfect for making individual servings ahead of time, making it ideal for parties or gatherings.
- Prep Time: 20 minutes
- Cook Time: 0 minutes
- Category: Dessert
- Method: No-Cook
- Cuisine: American

