If you have a sweet tooth and love bite-sized treats, you are going to adore this Chocolate Cake Pops Recipe. These little bundles of joy combine rich, moist chocolate cake with silky chocolate coating that melts in your mouth. Perfect for parties, gifting, or just cheering yourself up on a rainy day, these cake pops are as fun to make as they are to eat. Get ready to wow your taste buds and impress friends with a dessert that’s simply irresistible and visually delightful.
Ingredients You’ll Need
Don’t be intimidated by the list; these ingredients are simple pantry staples that pack a punch when combined. Each item plays a crucial role in delivering the perfect texture, flavor, and appearance that make this Chocolate Cake Pops Recipe so special.
- 1 cup (125g) all-purpose flour (spooned & leveled): Provides structure so the cake is light but sturdy enough for shaping.
- 1 cup (200g) granulated sugar: Adds sweetness and helps with the moist crumb.
- 6 Tablespoons (32g) unsweetened natural cocoa powder (1/3 cup + 1 Tbsp): Delivers that deep, rich chocolate flavor that’s not overpowering.
- 1/2 teaspoon baking soda: Acts as a leavening agent for a tender crumb.
- 1/4 teaspoon salt: Balances the sweetness and enhances chocolate flavor.
- 1/2 cup (120ml) canola, vegetable, or melted coconut oil: Keeps the cake moist without weighing it down.
- 2 large eggs, at room temperature: Bind the ingredients and add richness.
- 1 teaspoon pure vanilla extract: Intensifies the overall flavor with its warm aroma.
- 1/2 cup (120ml) hot water: Extracts and enhances the cocoa’s natural flavor for a luscious cake.
- 6 Tablespoons (85g) unsalted butter, softened to room temperature: Creates a creamy frosting base.
- 3/4 cup (90g) confectioners’ sugar: Sweetens and smooths the frosting to the perfect consistency.
- 1/2 cup (41g) unsweetened natural or Dutch-process cocoa powder: Adds richness and chocolate intensity to the frosting.
- 2–3 teaspoons heavy cream or milk: Adjusts frosting’s texture for a silky finish.
- 1/2 teaspoon pure vanilla extract: Boosts the frosting’s flavor depth.
- 24 ounces (680g) candy melts (or semi-sweet chocolate bars): For that beautifully glossy, hard coating that keeps the pops hold together and look stunning.
- Sprinkles: Adds a festive, colorful touch and is entirely optional but highly recommended!
How to Make Chocolate Cake Pops Recipe
Step 1: Preheat and Prepare
First things first, preheat your oven to 350°F (177°C). Grease your preferred 9-inch pan—round, square, or even a springform—to ensure your cake comes out cleanly and bakes evenly. This step sets the stage for success.
Step 2: Make the Chocolate Cake
In a large bowl, whisk together all your dry ingredients: flour, sugar, cocoa powder, baking soda, and salt. In another bowl, beat the oil, eggs, and vanilla extract until well combined. Slowly pour the wet mixture into the dry, then add hot water and whisk until the batter is smooth with no lumps. The hot water is the secret behind that ultra-moist texture and rich chocolate flavor. Pour into your greased pan and bake for 25–27 minutes. You’ll know it’s ready when a toothpick inserted in the center comes out clean. Allow the cake to cool completely—this is crucial for your cake pops to hold their shape.
Step 3: Prepare the Chocolate Frosting
Using a mixer fitted with a paddle attachment, beat softened butter on medium for about 2 minutes until creamy and smooth. Don’t forget to scrape down the sides for even mixing! Add confectioners’ sugar, cocoa powder, 2 teaspoons of heavy cream or milk, and vanilla extract; beat on low speed to combine, then crank it up to high for 3 minutes to create a luscious frosting. If it feels too thick, add a bit more milk or cream until it reaches a perfect spreadable consistency.
Step 4: Combine Cake and Frosting
Crumble the cooled cake into the bowl with your frosting, making sure there are no large clumps. Blend gently using your mixer on low speed until all the frosting is incorporated and the mixture is moist and sticky. This combination is what transforms the cake into pop-ready dough.
Step 5: Form Cake Balls
Take about 1 scant tablespoon (roughly 20 grams) of the cake-frosting mixture and roll it into a ball. Place the balls on a lined baking sheet. Chill them in the refrigerator for 2 hours or freeze for 1 hour until firm. This step makes dipping easier and keeps the shape intact.
Step 6: Melt the Coating
Melt your candy melts or semi-sweet chocolate in a microwave-safe container or using a double boiler. Heat in 20-second increments, stirring well between each until completely smooth. Allow the coating to cool slightly before using—too hot and it will crack when cooled on the cake pops.
Step 7: Dip and Decorate
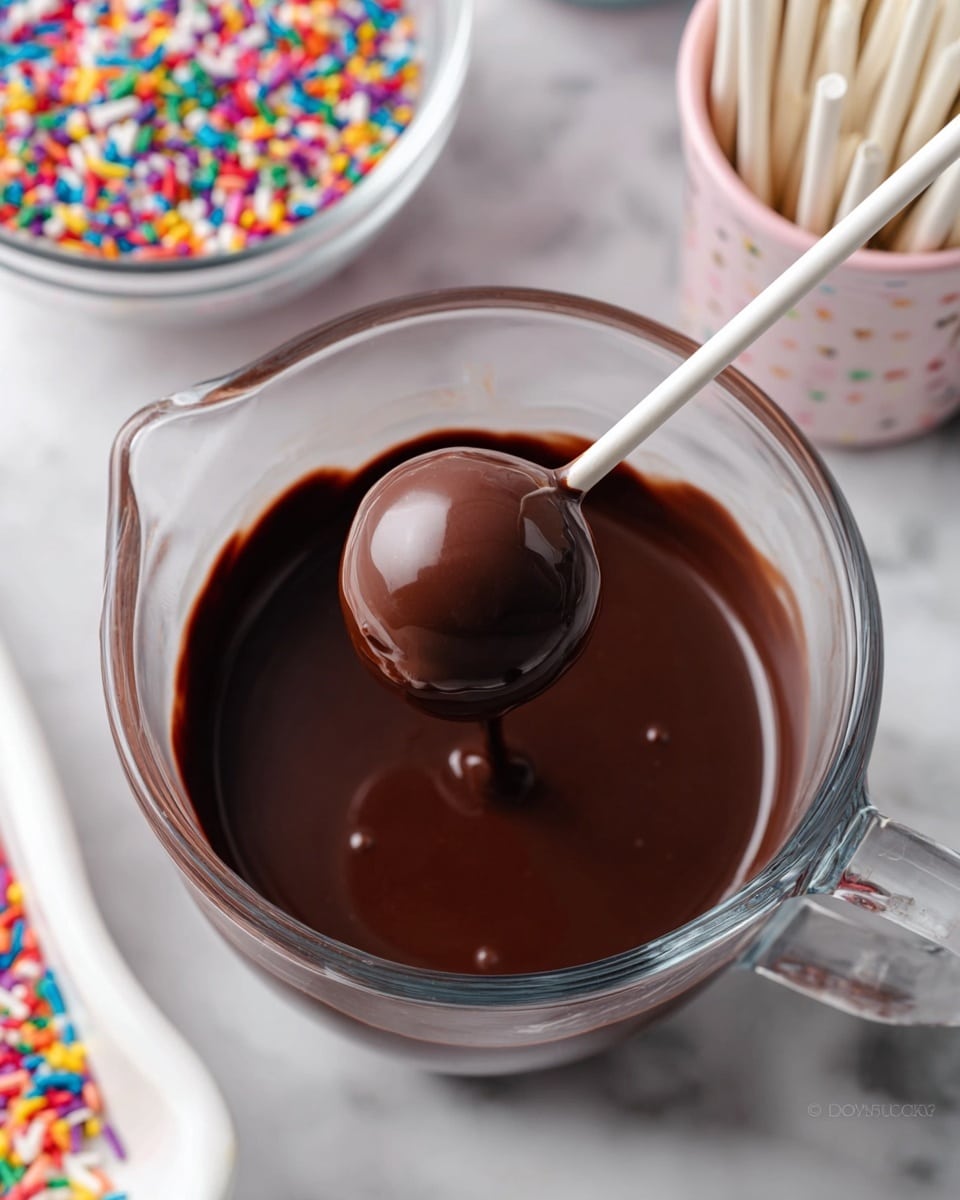
Remove just a few cake balls from the fridge at a time. Dip one end of a lollipop stick into the coating about half an inch, then insert it into the center of a cake ball. Dip the entire cake ball into the coating, cover it thoroughly, and gently tap off any excess. Before the coating sets, decorate with your favorite sprinkles. Place the pops upright into a polystyrene block or a box lined with parchment paper to dry completely for about an hour. Repeat until all your cake balls are beautifully dressed.
How to Serve Chocolate Cake Pops Recipe
Garnishes
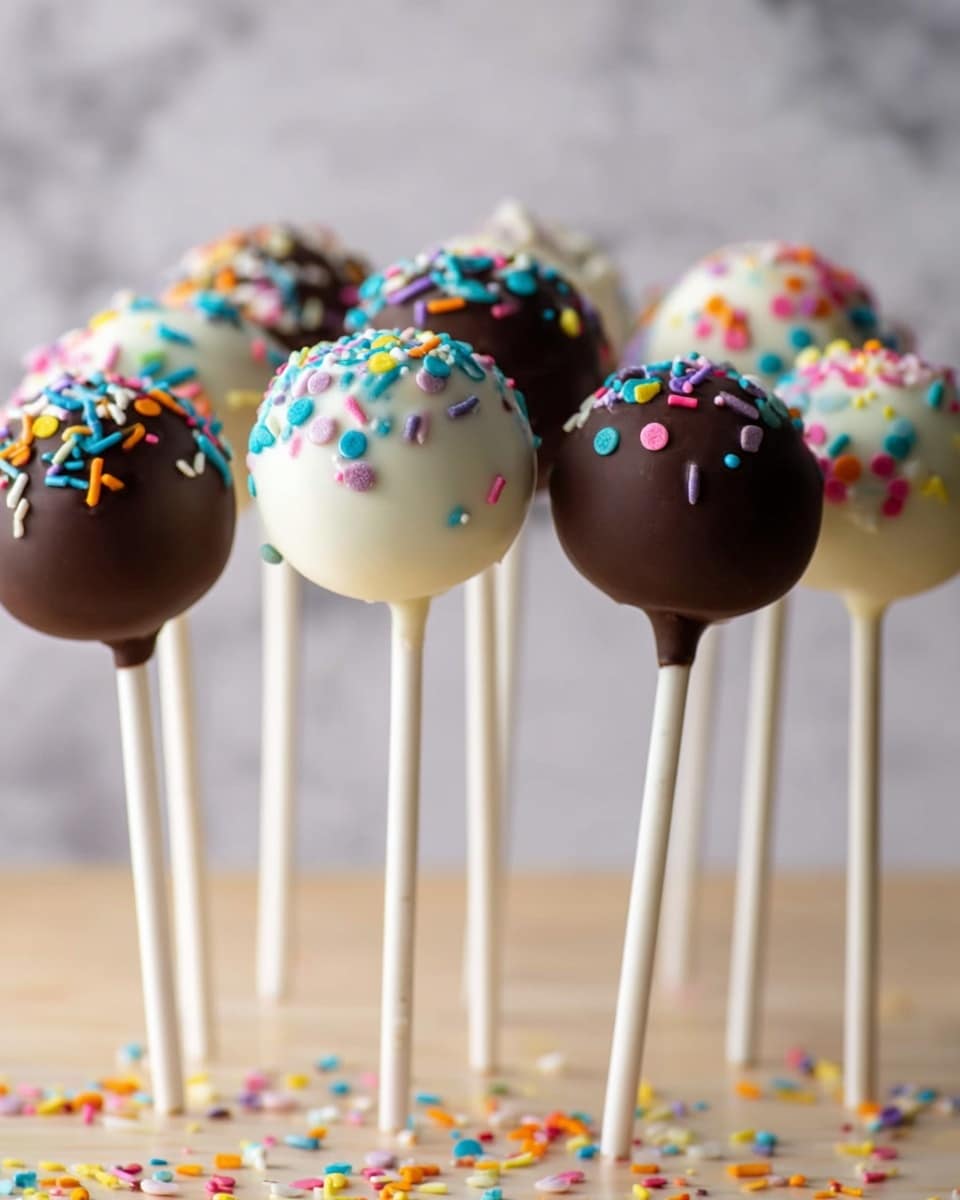
Sprinkles are a classic topping for a reason—they add a playful pop of color and texture that makes these treats perfect for celebrations. You can also try crushed nuts, edible glitter, or drizzle with contrasting chocolate for an elegant touch. Don’t be afraid to get creative!
Side Dishes
Serve your cake pops alongside a fresh fruit platter, a scoop of vanilla bean ice cream, or even a hot cup of coffee or rich hot chocolate. These pairings balance the chocolatey richness and provide a nice variety of textures and temperatures.
Creative Ways to Present
Arrange your Chocolate Cake Pops Recipe on a decorative foam block covered with colorful tissue paper or ribbons for a fantastic centerpiece. Use mason jars filled with candies or sprinkles as holders for an adorable party favor display. You can also wrap each pop individually in cellophane tied with a ribbon, turning them into charming edible gifts.
Make Ahead and Storage
Storing Leftovers
Your leftover cake pops will keep beautifully in an airtight container in the refrigerator for up to one week. Keep them upright if possible to protect their shiny coating and avoid melting or smudging.
Freezing
To freeze, place frozen cake pops on a parchment-lined tray until solid, then transfer them to a freezer bag or airtight container. They freeze well for up to three months. When you’re ready to enjoy, thaw in the refrigerator overnight to keep them fresh and prevent condensation from affecting the coating.
Reheating
Cake pops are best served chilled or at room temperature. If you prefer them a bit softer, let them sit out for 15–20 minutes before serving. Avoid microwaving as it may soften the coating too much or cause it to crack.
FAQs
Can I use boxed cake mix instead of making the cake from scratch?
Absolutely! A boxed chocolate cake mix can be a convenient shortcut. Just be sure to let the baked cake cool completely before combining with frosting for your pops.
What if I don’t have candy melts? Can I use regular chocolate?
You can use semi-sweet or dark chocolate bars, but candy melts are specially formulated to harden smoothly and hold their shape, which is why they’re preferred for cake pops.
How do I prevent the coating from cracking after dipping?
Let the coating cool slightly before dipping and work quickly with chilled cake balls. Also, avoid rapid temperature changes by not putting hot-coated pops directly into the refrigerator.
Can I make these gluten-free?
Yes! Substitute the all-purpose flour with a gluten-free baking flour blend, and double-check your other ingredients for gluten content to keep it safe for sensitive diets.
How long will the cake pops last at room temperature?
They are best enjoyed within a day if left out at room temperature, especially on warm days. For longer storage, keep them refrigerated to maintain freshness.
Final Thoughts
There’s something so heartwarming about holding a perfectly coated, irresistibly chocolaty cake pop in your hand. This Chocolate Cake Pops Recipe is a celebration of texture, flavor, and fun rolled into one delightful bite. Whether you’re new to cake pops or a seasoned pro, this recipe invites you to get creative and enjoy every delicious step. So grab those ingredients, and let’s make some magic happen in your kitchen!
Print
Chocolate Cake Pops Recipe
- Total Time: 3 hours (including chilling and setting time)
- Yield: 40 servings
Description
Delicious and festive Chocolate Cake Pops are a fun and bite-sized treat perfect for parties and celebrations. Made with a moist cocoa cake combined with a rich cocoa buttercream frosting, shaped into bite-sized balls, and coated with smooth candy melts or chocolate, these pops are as eye-catching as they are tasty.
Ingredients
Cake
- 1 cup (125g) all-purpose flour (spooned & leveled)
- 1 cup (200g) granulated sugar
- 6 Tablespoons (32g) unsweetened natural cocoa powder (1/3 cup + 1 Tbsp)
- 1/2 teaspoon baking soda
- 1/4 teaspoon salt
- 1/2 cup (120ml) canola, vegetable, or melted coconut oil
- 2 large eggs, at room temperature
- 1 teaspoon pure vanilla extract
- 1/2 cup (120ml) hot water
Frosting
- 6 Tablespoons (85g) unsalted butter, softened to room temperature
- 3/4 cup (90g) confectioners’ sugar
- 1/2 cup (41g) unsweetened natural or Dutch-process cocoa powder
- 2–3 teaspoons heavy cream or milk
- 1/2 teaspoon pure vanilla extract
Coating & Decoration
- 24 ounces (680g) candy melts (or semi-sweet chocolate bars)
- Sprinkles
Instructions
- Preheat and prepare pan: Preheat the oven to 350°F (177°C). Grease a 9-inch round, square, or springform pan to prevent sticking.
- Mix dry ingredients: In a large bowl, whisk together flour, granulated sugar, cocoa powder, baking soda, and salt until evenly combined.
- Mix wet ingredients and combine: In a medium bowl, whisk the oil, eggs, and vanilla extract. Pour the wet ingredients into the dry ingredients, add the hot water, and whisk thoroughly to combine with no dry pockets remaining.
- Bake the cake: Pour the batter evenly into the prepared pan and bake for 25–27 minutes. Check doneness by inserting a toothpick into the center; it should come out clean. Allow the cake to cool completely in the pan on a wire rack.
- Make the frosting: Using a handheld or stand mixer with a paddle attachment, beat butter on medium speed until creamy (about 2 minutes), scraping down the bowl sides as needed. Add confectioners’ sugar, cocoa powder, 2 teaspoons of heavy cream or milk, and vanilla extract. Beat on low speed to combine, then increase to high speed and beat for 3 minutes until fluffy. Add additional milk/cream if the frosting is too thick.
- Combine cake and frosting: Crumble the cooled cake into the bowl with the frosting, ensuring no large lumps remain. Mix on low speed until fully combined into a moist mixture.
- Form cake balls: Scoop about 1 scant tablespoon (20g) of the cake mixture per ball and roll into smooth balls. Arrange the cake balls on a lined baking sheet. Refrigerate for 2 hours or freeze for 1 hour until firm.
- Melt coating: Melt the candy melts or chocolate in a microwave-safe measuring cup in 20-second increments, stirring after each, until smooth. Alternatively, melt using a double boiler. Allow the coating to cool slightly before dipping to prevent cracking.
- Insert sticks and dip: Remove 2–3 cake balls from the refrigerator at a time. Dip the end of a lollipop stick about 1/2 inch into the melted coating, then insert it halfway to three-quarters into a cake ball. Dip the entire cake ball into the coating to cover completely, making sure the base where the stick meets the cake is well coated. Tap the stick gently against the measuring cup edge to remove excess coating. Decorate with sprinkles while the coating is wet.
- Set and store: Place the coated cake pops upright in a styrofoam block or box to dry. Repeat with remaining cake balls, keeping them refrigerated until ready to dip. Allow the coating to set fully, which takes about an hour. Store the cake pops in the refrigerator until serving.
Notes
- Make sure the cake is completely cooled before mixing with frosting to avoid melting the frosting.
- Chill the cake balls well before dipping to help the coating set properly and prevent cracking.
- If the coating is too thick, stir in a small amount of vegetable oil or shortening to thin it slightly.
- Work in small batches to keep cake balls cold and maintain coating quality.
- Store cake pops refrigerated and consume within 3–5 days for best freshness.
- Prep Time: 30 minutes
- Cook Time: 27 minutes
- Category: Dessert
- Method: Baking
- Cuisine: American

