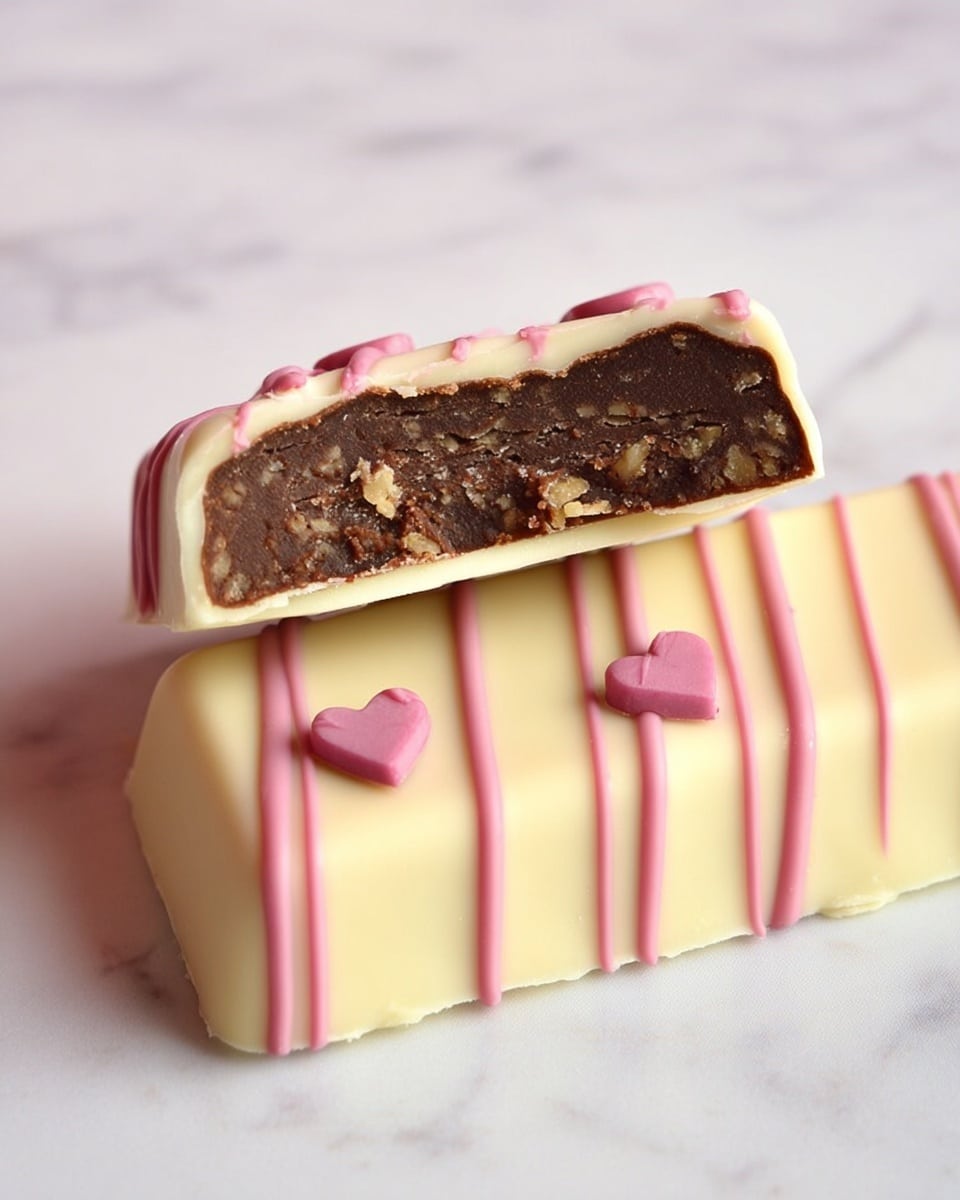
If you have a sweet tooth and love bite-sized, elegant treats, then you will absolutely adore this Chocolate Cakesicles with Brownie and White Chocolate Shell Recipe. Imagine rich, fudgy brownie packed inside a crisp, white chocolate shell that offers a perfect balance of texture and flavor. These adorable cakesicles are not just a feast for your eyes but also a delightful little indulgence perfect for parties, gifting, or simply pampering yourself on a cozy afternoon. Each bite melts in your mouth, blending luxurious chocolate with the soft, dense brownie center, making this recipe a true showstopper.
Ingredients You’ll Need
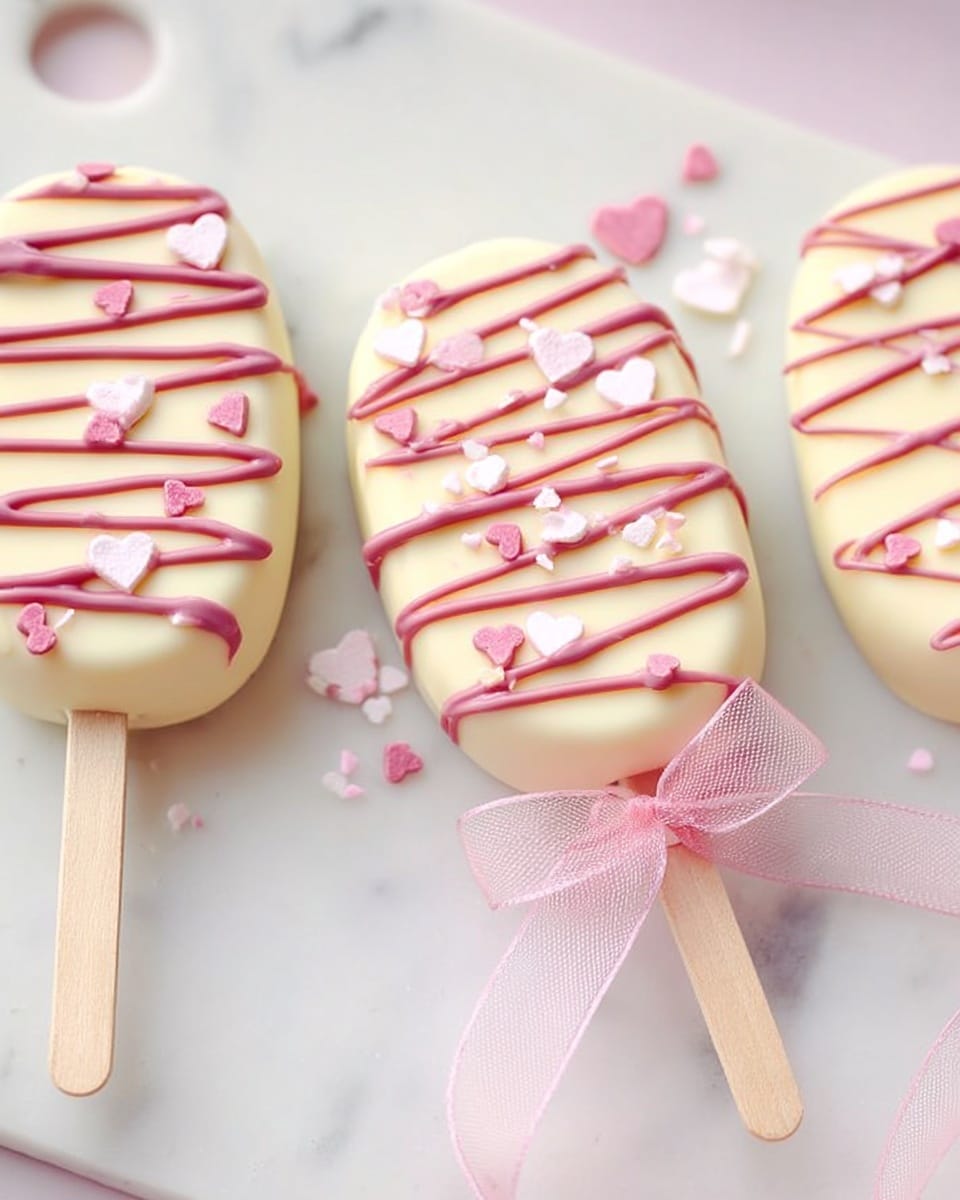
Gathering the right ingredients is super easy and essential for nailing this recipe. Each one plays a vital role in achieving the perfect combination of taste, texture, and visual appeal, from the fudgy brownie to the smooth white chocolate shell.
- Dark chocolate (1 cup): Choose 52% dark chocolate for intense cocoa flavor and smooth melting properties.
- Unsalted butter (½ cup + 5 ½ tablespoons): Adds richness and a creamy texture both to the brownie and ganache filling.
- Large eggs (2): Provide structure and help bind the brownie batter.
- Caster sugar (½ cup): Gives just the right sweetness without overpowering the chocolate.
- All-purpose flour (½ cup): Keeps the brownie tender but sturdy enough for crumbling into the filling.
- White chocolate (2 ½ cups): Perfect for creating a creamy, crisp shell that contrasts the brownie.
- Pink chocolate or ruby chocolate: Adds a pop of fun color to decoration.
- Heart sprinkles: Sweet little touches that add charm and a festive vibe to your cakesicles.
- Ice cream silicone mold (4 cavities): Ideal for shaping the cakesicles perfectly and for easy removal.
- Wooden popsicle sticks: Essential for that classic cakesicle look and easy handling.
- Heavy whipping cream (1 1/8 cup): For making luscious ganache if you opt for the ganache filling alternative.
- Semi-sweet chocolate (2 2/3 cups): Best used in ganache to balance sweetness and create a creamy texture.
How to Make Chocolate Cakesicles with Brownie and White Chocolate Shell Recipe
Step 1: Preparing the Brownie Batter
Start by preheating your oven to 350°F (180°C) and lining your brownie tin with parchment paper for easy removal. Melting dark chocolate and butter together slowly ensures a luscious base—do this in short bursts in the microwave or over low heat, stirring frequently to avoid burning. While they melt, whisk together eggs and caster sugar until combined, then fold this into your melted chocolate mixture. Finally, toss in the flour and stir gently until the batter is smooth and cohesive. This batter will become the fudgy core of your cakesicles, so don’t rush the mixing.
Step 2: Baking the Brownie
Pour the batter into the prepared tin and bake for 15-18 minutes. Aim for a slightly crusty top with a soft, almost underbaked center because you want a fudgy, moist texture that crumbles nicely later on. Once baked, allow the brownie to cool completely in the tin. Cooling is crucial—it helps the brownie firm up just enough for the next steps.
Step 3: Creating the White Chocolate Shell
While your brownie cools, slowly melt the white chocolate, taking care to keep it smooth and glossy. You want to coat each ice cream mold cavity evenly with this melted chocolate, covering every side and bottom thoroughly to form a sturdy shell. Don’t forget to insert your wooden popsicle sticks about a quarter way into each cavity before chilling—the shells must set around the sticks for easy assembly later. Chill your molds in the fridge or freezer until completely firm.
Step 4: Making the Brownie Filling
Once your brownie is cool, crumble it into small pieces. Wearing gloves can help with clean mixing. Press and knead the crumbs gently by hand until they begin to stick together, forming a pliable cake dough. Fill each chocolate-coated mold cavity around the stick with this brownie mixture, making sure to fill the cavities to the top without applying too much pressure that might crack the shell. This part is where your attention to detail makes all the difference in texture.
Step 5: Sealing and Decorating the Cakesicles
After filling, spread a final layer of melted white chocolate over the back of each cakesicle to seal everything in, smoothing out the edges to prevent cracks. Chill again until fully hardened. Once set, carefully pop your cakesicles out of the molds, and prepare for some fun decoration. Melt your pink or ruby chocolate and drizzle artistically over the cakesicles using a piping bag. Before the chocolate hardens, sprinkle with heart sprinkles for a charming finishing touch that’s as delightful to look at as it is to eat.
How to Serve Chocolate Cakesicles with Brownie and White Chocolate Shell Recipe
Garnishes
Simple garnishes like heart sprinkles or edible gold dust elevate these cakesicles wonderfully. Fresh berries or crushed freeze-dried raspberries can also add a fruity brightness that complements the chocolate beautifully. Don’t be afraid to get creative with your finishing touches—they make the cakesicles even more inviting.
Side Dishes
Pair these decadent cakesicles with a scoop of vanilla ice cream or a dollop of whipped cream to add lightness. Fresh fruit salad or a warm cup of coffee or tea balances the richness and makes your dessert experience feel complete and satisfying.
Creative Ways to Present
Display your cakesicles standing upright in a pretty glass filled with colorful sprinkles or crushed cookies for an eye-catching party centerpiece. Wrapping each in clear cello bags tied with ribbon makes adorable gifts. You can even set them on small dessert plates with edible flowers for a chic, elegant presentation that’s guaranteed to impress.
Make Ahead and Storage
Storing Leftovers
These cakesicles store best at room temperature in an airtight container away from direct sunlight to keep the chocolate shells shiny and crisp. They will stay fresh for up to 5 days, giving you plenty of time to savor the treat at your leisure.
Freezing
If you want to keep your cakesicles longer, freezing is an excellent option. Place them in a single layer on a tray first to freeze solid, then transfer to an airtight container. When thawed in the fridge, they maintain their texture and flavor beautifully—perfect for prepping ahead of time.
Reheating
These cakesicles are best enjoyed cold or room temperature, so reheating is not necessary. If you want to soften the brownie inside slightly, simply let them sit at room temperature for 10-15 minutes before serving. Avoid microwaving to keep the shells intact.
FAQs
Can I use chocolate chips instead of chopped chocolate?
For the best texture and melting quality, chopped chocolate is preferred over chocolate chips, which often contain stabilizers and don’t melt as smoothly. Using good-quality baking chocolate will dramatically improve your final result.
Is it possible to make these gluten-free?
Absolutely! Substitute the all-purpose flour with a gluten-free flour blend suitable for baking. Make sure the blend contains xanthan gum or other binders for the best structure in the brownie base.
Can I use a different type of mold for shaping?
Yes, silicone molds with cavities of similar size and depth work well. Ensure the molds are flexible for easy removal and clean spreading of the chocolate shell.
How do I avoid the chocolate shell cracking?
Be gentle when packing the brownie filling to avoid applying too much pressure. Also, make sure the shell is thick enough and fully set before filling to prevent cracking during assembly.
Can I make these without the brownie base?
Yes! The recipe includes a ganache filling alternative, which is creamy and decadent. It’s a fantastic choice if you prefer a smoother texture or want to mix things up.
Final Thoughts
I hope this inspires you to dive into making your own delightful Chocolate Cakesicles with Brownie and White Chocolate Shell Recipe. They are a perfect balance of elegance and fun, a treat that’s sure to impress anyone lucky enough to get a slice – or rather a stick! Whether for a special occasion or a little self-love moment, these cakesicles are impossible to resist and so rewarding to create.
Print
Chocolate Cakesicles with Brownie and White Chocolate Shell Recipe
- Total Time: 55 minutes
- Yield: 4 cakesicles
Description
Delightfully indulgent cakesicles combining rich, homemade brownies or optional ganache filling coated in a crisp white chocolate shell, decorated with pink chocolate drizzle and heart sprinkles. These bite-sized treats on sticks are perfect for parties or a special dessert with elegant presentation and luscious flavor.
Ingredients
Brownie Cake:
- 1 cup dark chocolate (52% cocoa), broken into chunks
- 1/2 cup unsalted butter
- 2 large eggs
- 1/2 cup caster sugar
- 1/2 cup sieved all-purpose flour
White Chocolate Shell:
- 2 ½ cups white chocolate (total)
- Pink chocolate (ruby chocolate or pink candy melts) for decoration
- Heart sprinkles for decoration
- Wooden popsicle sticks
Ganache Filling (optional):
- 1 1/8 cup heavy whipping cream
- 2 2/3 cups (16 oz) semi-sweet chocolate, chopped (not chips)
- 5 1/2 tablespoons unsalted butter, room temperature, cubed
Equipment:
- Ice cream silicone mould with 4 cavities
- Brownie tin or small roasting tin (5.5 x 8 inches / 14 x 20 cm)
Instructions
- Preheat: Set your oven to 350°F (180°C) to prepare for baking the brownie base.
- Prepare Ingredients: Measure all ingredients and line your brownie tin or roasting tin with parchment paper or grease with cooking spray.
- Melt Chocolate and Butter: In a microwave-safe bowl, melt the dark chocolate and butter together in 20-second bursts, stirring until smooth, or melt gently over low heat on stovetop, stirring frequently.
- Mix Brownie Batter: In a separate bowl, whisk together the eggs and caster sugar, then add to the melted chocolate and butter mixture. Finally, fold in the sieved flour until a smooth batter forms.
- Bake Brownies: Pour the batter into the prepared tin and bake for 15-18 minutes until the top is lightly crusty but the center remains soft. Avoid overbaking to maintain moistness critical for the cake filling.
- Cool Brownies: Allow the brownies to cool completely in the tin before proceeding.
- Prepare Chocolate Shell: Slowly melt white chocolate. Spoon melted white chocolate into each cavity of the silicone mould, coating the entire surface including sides and bottom. Rotate the mould or use the back of a spoon to spread evenly.
- Insert Sticks: Place wooden popsicle sticks about a quarter of the way into each mould cavity while the white chocolate is still soft. Chill the mould in the fridge for 25 minutes (or freezer for 15 minutes) until the chocolate sets.
- Make Cake Filling: Break the cooled brownie into small pieces, then crumble and mix with your hands until a cohesive cake dough forms.
- Fill Moulds: Pack the cake mixture into each mould cavity around the stick, filling to the top. Be gentle to avoid cracking the chocolate shell.
- Seal Cakesicles: Spread a layer of melted white chocolate over the back of the cakesicles to seal the filling. Scrape off any excess chocolate for smooth edges.
- Chill Again: Refrigerate the filled moulds for at least 25 minutes or freeze for 15 minutes until the chocolate is firm.
- Remove from Mould: Carefully pop the cakesicles out of the silicone moulds once set.
- Decorate: Melt the pink chocolate and transfer to a piping bag. Drizzle over the cakesicles and immediately sprinkle with heart decorations so they adhere as the drizzle sets.
- Enjoy: Serve and savor these beautiful, decadent bite-sized treats.
- Optional Ganache Filling: Warm heavy cream over low heat until it begins to boil, then remove from heat. Add semi-sweet chopped chocolate and let sit for a few minutes, then whisk until smooth. Whisk in cubed butter. Let ganache cool before pouring into moulds. Chill until firm, then continue with white chocolate shell and decoration as above.
- Storage: Store ganache-filled cakesicles at room temperature for up to 5 days.
Notes
- Use good quality chocolate (52% cocoa dark chocolate recommended) for best taste.
- Do not overbake brownies to keep the filling moist and workable.
- Be gentle when filling moulds to prevent cracking the chocolate shell.
- Wear gloves when crumbling cake to keep it clean and hygienic.
- For quicker setting, place moulds in the freezer for 15 minutes instead of fridge.
- Ganache version offers a creamy alternative to brownie filling allowing for variety.
- Ensure to insert wooden sticks while shell is still soft for secure placement.
- Prep Time: 15 minutes
- Cook Time: 18 minutes
- Category: Dessert
- Method: Baking
- Cuisine: American

