If you’ve ever dreamed of a dessert that combines the rich nuttiness of peanut butter with a melt-in-your-mouth sweetness, this Creamy Peanut Butter Fudge Recipe will absolutely delight your taste buds. It’s incredibly simple to whip up, yet yields a satisfyingly smooth, indulgent treat that’s perfect for sharing or savoring all by yourself. This fudge strikes the perfect balance between creamy texture and that signature peanut butter flavor, making it an absolute crowd-pleaser any time of year.
Ingredients You’ll Need
Ingredients You’ll Need
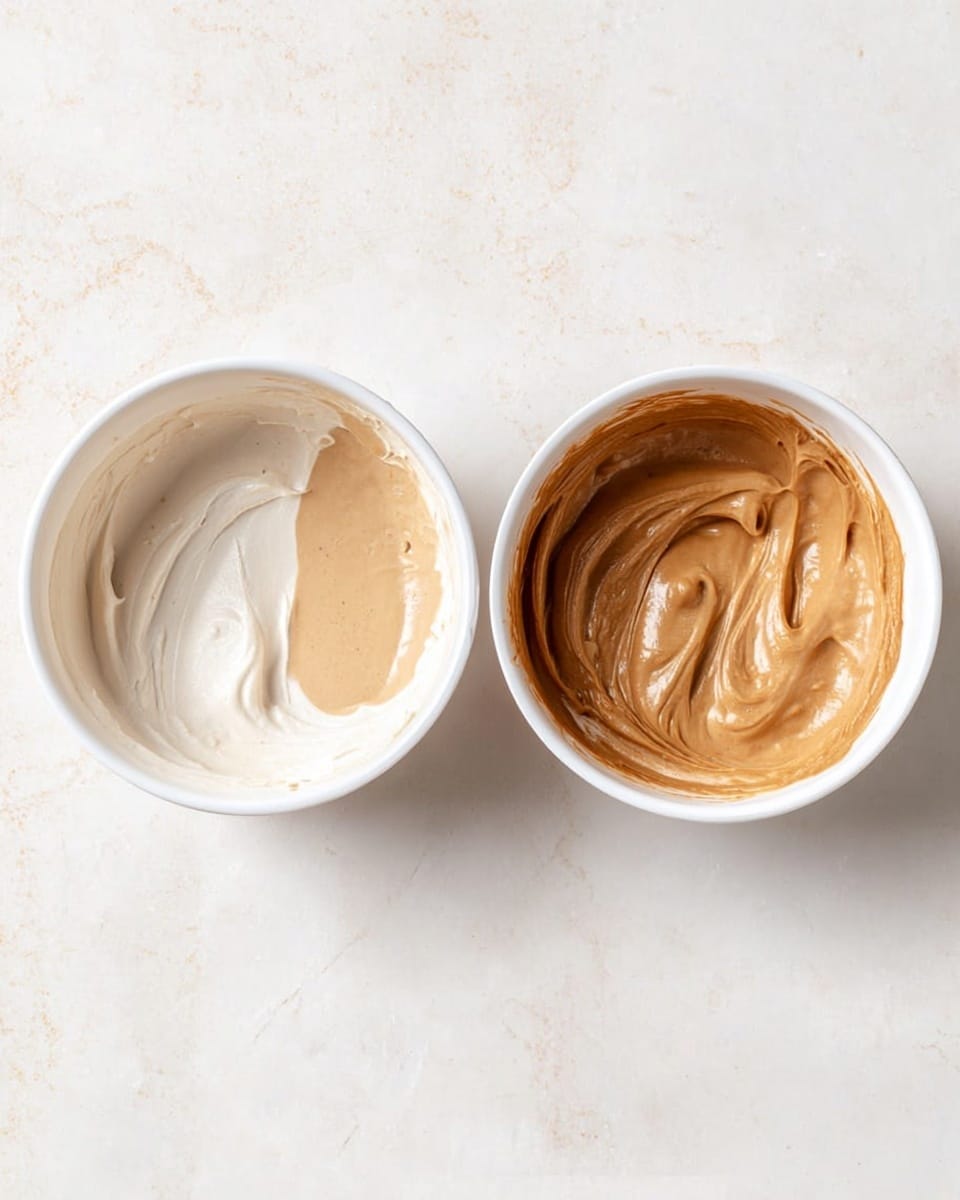
Gathering your ingredients for this fudge is a breeze since you only need two essential pantry staples that work together to create a luscious and creamy finish. Each one has a special role in delivering texture, sweetness, and that classic peanut butter charm we all love.
- 16 ounces creamy peanut butter: Using a smooth variety like Jif or Skippy ensures the fudge is silky, with no gritty bits—avoid natural peanut butter for best results.
- 16 ounces vanilla frosting: This adds sweetness and helps give the fudge its irresistible, soft but firm consistency.
How to Make Creamy Peanut Butter Fudge Recipe
Step 1: Prepare Your Pan
First things first, line an 8×8-inch square baking pan with parchment paper, leaving some overhang on the sides. This extra bit of parchment will be your secret weapon for easily lifting the fudge out later without any mess.
Step 2: Combine the Ingredients
In a large microwave-safe bowl, add the creamy peanut butter and vanilla frosting. This duo is the heart and soul of the fudge, and combining them evenly is essential for that perfect texture.
Step 3: Melt Together in the Microwave
Microwave the mixture for 30 seconds, then take a moment to stir it all together, ensuring any thick spots start to smooth out nicely. Then microwave it again for another 15 to 30 seconds until the blend becomes completely smooth and fully combined.
Step 4: Spread and Chill
Pour the glossy mixture into your prepared pan and use a spatula to spread it out evenly. This helps the fudge set perfectly and look gorgeous for when you slice it up.
Step 5: Refrigerate Until Firm
Place the pan in the refrigerator for 1 to 2 hours so the fudge can set and achieve that ideal sliceable firmness. Patience here is key because the waiting just makes the payoff sweeter.
Step 6: Slice and Serve
Once firm, gently lift the fudge from the pan using the parchment paper overhang and place it on a cutting board. Cut into squares of your desired size, and get ready to indulge!
How to Serve Creamy Peanut Butter Fudge Recipe
Garnishes
A simple sprinkle of chopped peanuts or a light dusting of flaky sea salt adds an extra dimension of crunch and a subtle burst of flavor that perfectly complements the fudge’s creaminess. You can also drizzle melted dark chocolate for a touch of decadence.
Side Dishes
This fudge pairs beautifully with a glass of cold milk or a cup of rich coffee or tea, which balances the sweetness and enhances the overall experience. For a more festive touch, serving it alongside fresh fruit or berries can add a refreshing contrast.
Creative Ways to Present
Think outside the box by layering squares of fudge between wax paper in a decorative tin for gift-giving or party platters. You could also use cookie cutters to make festive shapes or cut bite-sized pieces to serve on appetizer trays at gatherings.
Make Ahead and Storage
Storing Leftovers
Store leftover fudge in an airtight container in the refrigerator to keep it fresh and maintain its creamy texture. Properly stored, it will stay delicious for up to two weeks, so you have plenty of time to enjoy every bite.
Freezing
If you want to keep the fudge longer, wrap individual pieces tightly in plastic wrap and place them in a freezer-safe container or zip-top bag. Frozen fudge can last for up to three months, making it a convenient treat to have ready for any occasion.
Reheating
Thaw frozen fudge in the refrigerator overnight before serving. Avoid microwaving directly as this can affect the texture. Bring it to room temperature for the best flavor and softness when enjoying.
FAQs
Can I use crunchy peanut butter instead of creamy?
While you can, using crunchy peanut butter will change the texture of this fudge. Creamy peanut butter ensures a smooth and consistent finish, but if you love some crunch, feel free to experiment. Just expect a bit of added texture in each bite.
Is it necessary to use vanilla frosting?
Yes, vanilla frosting helps sweeten and bind the fudge, contributing significantly to the creamy texture and balance of flavors. Using plain sugar or other substitutes might alter the texture and sweetness level drastically.
How long does it take to set the fudge properly?
Chilling in the refrigerator for 1 to 2 hours is typically enough for the fudge to firm up nicely. If it still seems too soft, give it additional time to chill until it slices cleanly.
Can I make this fudge without a microwave?
Absolutely! You can melt the peanut butter and frosting gently on the stovetop using a double boiler, stirring continuously until smooth. This method might take a bit longer but offers more control over the melting process.
What is the best way to cut the fudge without it crumbling?
Use a sharp knife and warm it under hot water, then wipe it dry before slicing. This method helps make clean cuts through the fudge without causing it to crumble or stick to the blade.
Final Thoughts
There’s something truly magical about how simple ingredients come together to create the perfect balance of creamy, sweet, and nutty in this Creamy Peanut Butter Fudge Recipe. Whether you’re a seasoned fudge lover or just starting to explore homemade treats, this recipe will become one of your go-to treasures. I can’t wait for you to try it and share your sweet success with friends and family!
Print
Creamy Peanut Butter Fudge Recipe
- Total Time: 1 hour 5 minutes
- Yield: 25 servings
Description
This easy and delicious Butter Fudge recipe combines creamy peanut butter and sweet vanilla frosting to create a smooth, rich, and buttery treat that sets quickly in the fridge, perfect for snacking or sharing at gatherings.
Ingredients
Ingredients
- 1 (16-ounce) jar creamy peanut butter (Jif or Skippy recommended, do not use natural)
- 1 (16-ounce) tub vanilla frosting
Instructions
- Prepare pan: Line an 8×8-inch square baking pan with parchment paper, leaving some overhang on the sides to help lift the fudge out easily later.
- Combine ingredients: In a large microwave-safe bowl, combine the peanut butter and vanilla frosting, stirring slightly to mix.
- Microwave first time: Microwave the mixture for 30 seconds, then remove and stir thoroughly to help everything start blending evenly.
- Microwave second time: Microwave again for an additional 15 to 30 seconds until the mixture is smooth and fully combined without any lumps.
- Pour mixture: Pour the smooth mixture into the prepared baking pan and spread it evenly with a spatula for a uniform thickness.
- Refrigerate: Place the pan in the refrigerator and chill for 1 to 2 hours, or until the fudge is firm to the touch.
- Slice and serve: Once firm, lift the fudge out of the pan using the parchment paper overhang. Slice into squares and serve.
Notes
- Use creamy peanut butter rather than natural as it blends smoother and yields better texture.
- The vanilla frosting provides both sweetness and smoothness, perfect for a fudge-like consistency.
- Refrigeration time can vary; ensure fudge is firm enough to slice cleanly.
- Store fudge in an airtight container in the refrigerator for up to one week.
- For easy portion control, slice into 25 squares as suggested.
- Prep Time: 10 minutes
- Cook Time: 1 minute
- Category: Dessert
- Method: Microwaving
- Cuisine: American

