There is nothing quite as comforting and crowd-pleasing as this Easy Banana Pudding Recipe. It effortlessly blends creamy banana pudding, layers of crisp Nilla wafers, and fresh, sweet banana slices into a dreamy dessert that you’ll want to make again and again. Whether you’re whipping it up for a family gathering, potluck, or just a weeknight treat, this recipe is a delightfully simple way to bring smiles and memories to the table.
Ingredients You’ll Need
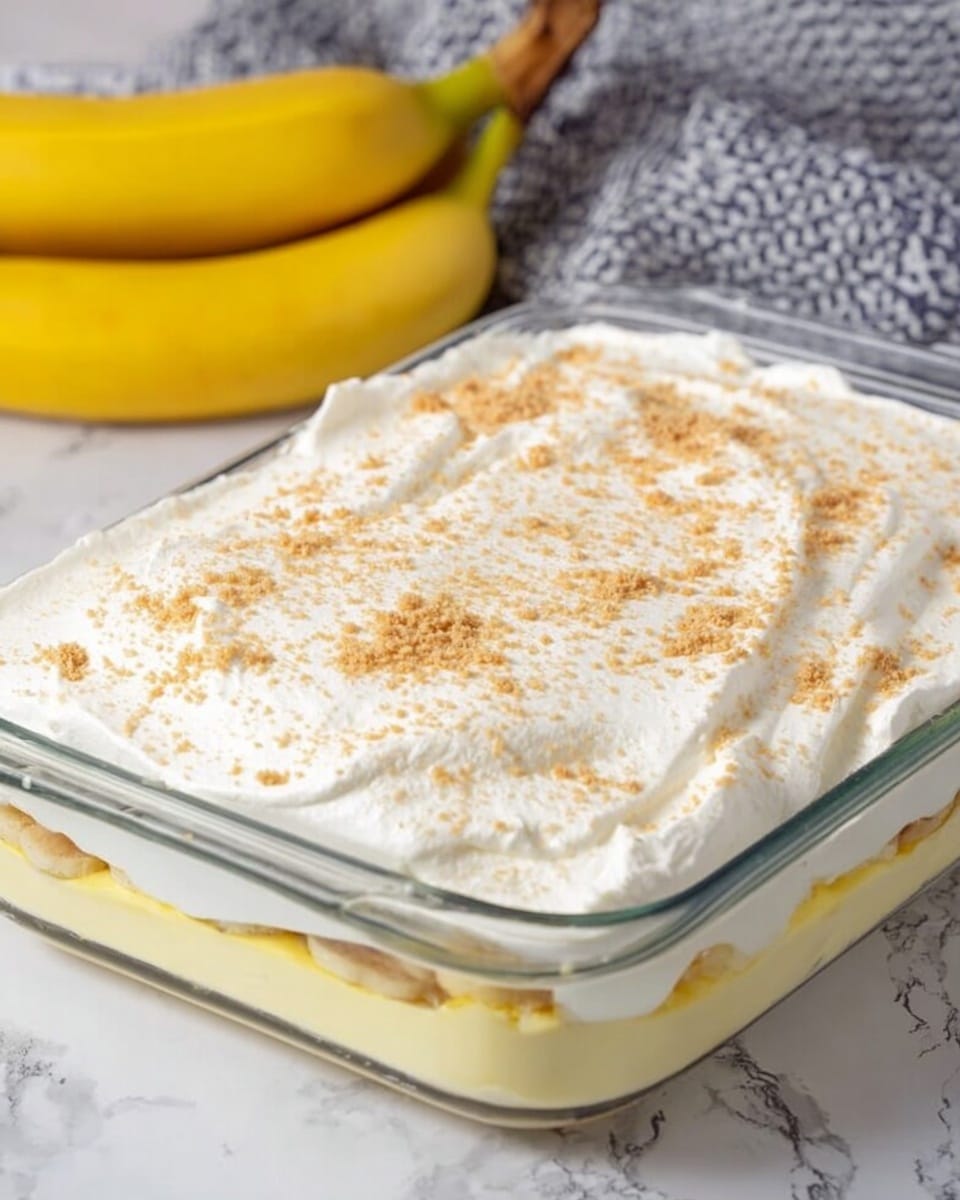
Getting started with this Easy Banana Pudding Recipe is a breeze thanks to its straightforward, accessible ingredients. Each element plays a unique role in balancing creaminess, sweetness, texture, and that classic banana flavor we all love.
- Instant Banana Cream pudding mix: This provides the signature banana flavor and creamy texture that’s essential to the dish.
- Cold milk: Helps create a smooth, luscious pudding when combined with the mix.
- Nilla Wafers: These classic cookies add a crisp bite and a subtle vanilla sweetness that pairs perfectly with the bananas.
- Fresh bananas: Sliced bananas bring natural sweetness and freshness, making each bite heavenly.
- Cool Whip: Folding this in provides a light, airy finish that keeps the pudding from feeling too heavy.
How to Make Easy Banana Pudding Recipe
Step 1: Prepare the Pudding Mixture
In a large bowl, whisk together the cold milk and instant banana cream pudding mix until it’s smooth and thickened. This step is the base of our dessert, so take a moment to enjoy how quickly the creamy texture develops.
Step 2: Layer the First Base
Reserve about five Nilla wafers for decorating later. Then line the bottom of a 9×13 inch pan with a layer of Nilla wafers. This crisp foundation creates a wonderful contrast to the creamy pudding layers.
Step 3: Add the Fresh Banana Layer
Place sliced bananas evenly over the cookie layer. Their natural sweetness and soft texture add freshness that brightens the richness of the pudding.
Step 4: Blend Cool Whip into Pudding
Fold half of the Cool Whip into the pudding mixture gently, combining airiness with creamy banana flavor. This keeps the dessert light and fluffy, such a treat to dig into!
Step 5: Layer the First Pudding Portion
Pour half of your Cool Whip and pudding mix over the banana and cookie layers, smoothing it out evenly. Layering this way ensures every spoonful will have a balanced, delicious bite.
Step 6: Repeat the Layers
Add another layer of Nilla wafers, followed by another layer of sliced bananas. Layering perfectly keeps the texture interesting and the flavors delightfully complex.
Step 7: Add the Final Pudding Layer
Pour the remaining pudding mixture over your second layer of cookies and bananas, making sure to spread it evenly for a tidy, inviting look.
Step 8: Top with Cool Whip and Crushed Cookies
Spread the remaining Cool Whip over the pudding’s top. Finally, crush the reserved Nilla wafers and sprinkle them over the Cool Whip for a pretty, crunchy finish that invites you to dig right in.
How to Serve Easy Banana Pudding Recipe
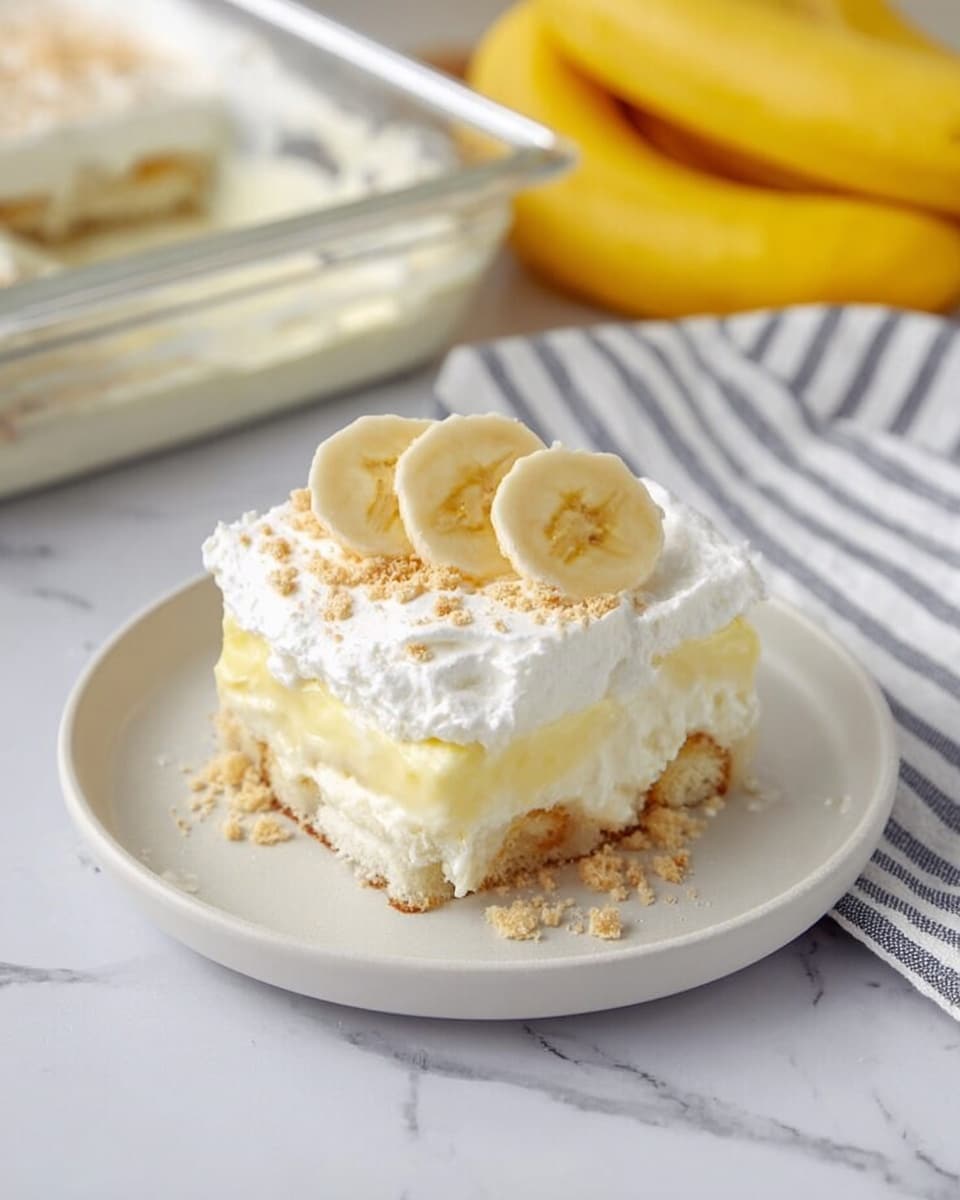
Garnishes
For an extra touch, consider garnishing with thinly sliced bananas on top along with a few whole Nilla wafers or a sprinkle of cinnamon. These little details add visual appeal and enhance the banana aroma.
Side Dishes
This pudding pairs beautifully with light, fresh sides. Think bright fruit salad or a crisp green salad with a tangy vinaigrette to balance out the dessert’s sweetness and creaminess.
Creative Ways to Present
Try serving this Easy Banana Pudding Recipe in individual glass cups or mason jars for an elegant touch, especially during parties. Layering the ingredients visibly in clear containers gives each portion a gorgeous, inviting look that tempts guests to dive in.
Make Ahead and Storage
Storing Leftovers
Store any leftover banana pudding covered with plastic wrap or an airtight lid in the refrigerator. It’s best eaten within 3 days for the freshest taste and texture, as bananas may darken over time.
Freezing
Freezing banana pudding isn’t ideal because the texture of the bananas and Cool Whip may become watery or grainy after thawing. It’s best to enjoy it fresh or within a few days refrigerated.
Reheating
This pudding is designed to be served cold, so reheating isn’t necessary. If you prefer a room-temperature treat, just let it sit out for 15–20 minutes before serving.
FAQs
Can I substitute fresh bananas with another fruit?
While fresh bananas are the heart of this recipe, some people enjoy mixing in sliced strawberries or peaches for a twist. Keep in mind this will change the flavor profile and traditional appeal.
What can I use instead of Cool Whip?
If you prefer, you can substitute homemade whipped cream or a dairy-free whipped topping. Each will provide a slightly different texture but still keep the pudding light and fluffy.
Is it necessary to use instant pudding mix?
Yes, the instant banana cream pudding mix is key to achieving that classic banana pudding flavor and creamy consistency with minimal effort.
Can I make this pudding gluten-free?
Absolutely! Simply swap out the Nilla Wafers for gluten-free vanilla cookies or wafers, and you’re good to go without compromising flavor or texture.
How long should I chill the pudding before serving?
Chilling for at least 2 hours allows the cookies to soften slightly and the flavors to meld beautifully. Overnight chilling yields an even more delicious, cohesive dessert.
Final Thoughts
This Easy Banana Pudding Recipe is a gem that combines simplicity, flavor, and that nostalgic comfort we all crave. It’s quick to assemble, requires no baking, and always impresses with every creamy, sweet bite. Give it a try—you might just find your new favorite dessert in no time!
Print
Easy Banana Pudding Recipe
- Total Time: 15 minutes
- Yield: 15 servings
Description
This Easy Banana Pudding Recipe is a classic Southern dessert that’s creamy, sweet, and delightfully layered with banana slices, Nilla wafers, and whipped topping. Perfect for family gatherings or potlucks, it requires no baking and comes together quickly, making it an ideal treat for any occasion.
Ingredients
Banana Pudding Mix
- 5.1 ounces Instant Banana Cream pudding (1 box)
- 3 cups cold milk
Layers
- 11 ounces Nilla Wafers (1 box)
- 4 bananas, sliced
- 8 ounces Cool Whip (whipped topping)
Instructions
- Prepare pudding mixture: In a large bowl, combine the cold milk and instant banana cream pudding mix. Beat or whisk thoroughly until the mixture is smooth and begins to thicken.
- Set aside cookies for topping: Reserve about 5 Nilla wafers for decoration on top of the pudding. Then, place a single layer of Nilla wafers evenly across the bottom of a 9×13 inch pan or casserole dish.
- Layer bananas: Add a layer of sliced bananas over the Nilla wafers, distributing them evenly.
- Mix in Cool Whip: Whisk in half of the Cool Whip into the prepared pudding mixture until well combined and creamy.
- First pudding layer: Pour half of this pudding mixture evenly over the banana and cookie layers. Use a spatula to smooth out the surface.
- Repeat layers: Add another layer of Nilla wafers on top of the pudding, followed by another layer of sliced bananas.
- Final pudding layer: Spread the remaining half of the pudding mixture over the second banana and cookie layer, smoothing it evenly.
- Top with Cool Whip and crushed cookies: Spread the remaining Cool Whip on top of the pudding as the final layer. Crush the reserved Nilla wafers and sprinkle the crumbs evenly over the Cool Whip for garnish.
Notes
- For best flavor, chill the pudding for at least 2 hours before serving to allow the flavors to meld and the cookies to soften slightly.
- You can substitute Cool Whip with homemade whipped cream for a fresher taste.
- Use firm, ripe bananas for optimal texture; overly ripe bananas may become mushy.
- This dessert can be made a day ahead and kept covered in the refrigerator.
- Prep Time: 15 minutes
- Cook Time: 0 minutes
- Category: Dessert
- Method: No-Cook
- Cuisine: American
