If you have been searching for a perfect bake to brighten your mornings or impress friends at tea time, this Easy Homemade Scones Recipe is an absolute must-try. With a tender crumb, a golden crust, and that delightful buttery flavor that puts bakery scones to shame, these treats hit every mark. The recipe is straightforward, ensures a quick turnaround, and results in scones that are delightfully flaky without fuss—ideal for both beginners and seasoned bakers looking for a reliable staple.
Ingredients You’ll Need
Let’s start with the basics, because this Easy Homemade Scones Recipe relies on a handful of simple but crucial ingredients. Each one plays a special role, whether it’s lending structure, moisture, or that irresistible buttery richness that makes scones so addictive.
- 3 cups all-purpose flour: Acts as the foundation, giving structure and that perfect tender crumb when handled just right.
- 3½ teaspoons baking powder: The key leavening agent that helps these scones rise beautifully and become light and fluffy.
- 1 teaspoon salt: Balances flavor and enhances the buttery notes, but can be omitted if you use salted butter.
- 3 tablespoons white granulated sugar: Adds a subtle sweetness and helps with browning; feel free to skip if you want your scones savory.
- ¾ cup unsalted butter (cold, cubed): The star of the show that creates flaky layers and that rich, buttery taste.
- ¾ cup whole milk (cold): Provides moisture and tenderizes the dough while keeping it light and fluffy.
How to Make Easy Homemade Scones Recipe
Step 1: Preheat and Prepare
Kick things off by preheating your oven to a lively 220°C (425°F) to ensure it’s hot enough for a perfect rise and crust. Lining a baking tray with parchment paper prevents sticking and makes cleanup a breeze.
Step 2: Mix Dry Ingredients
In a large bowl, whisk together your flour, baking powder, salt, and sugar. Doing this thoroughly not only combines flavors evenly but also helps give your scones that tender texture.
Step 3: Cut in the Butter
Add the cold, cubed butter and use a pastry cutter or your fingers to work it into the flour mixture. Aim for a coarse crumb texture where small bits of butter remain—this is essential for flaky layers, so resist the urge to overwork!
Step 4: Add Milk and Form Dough
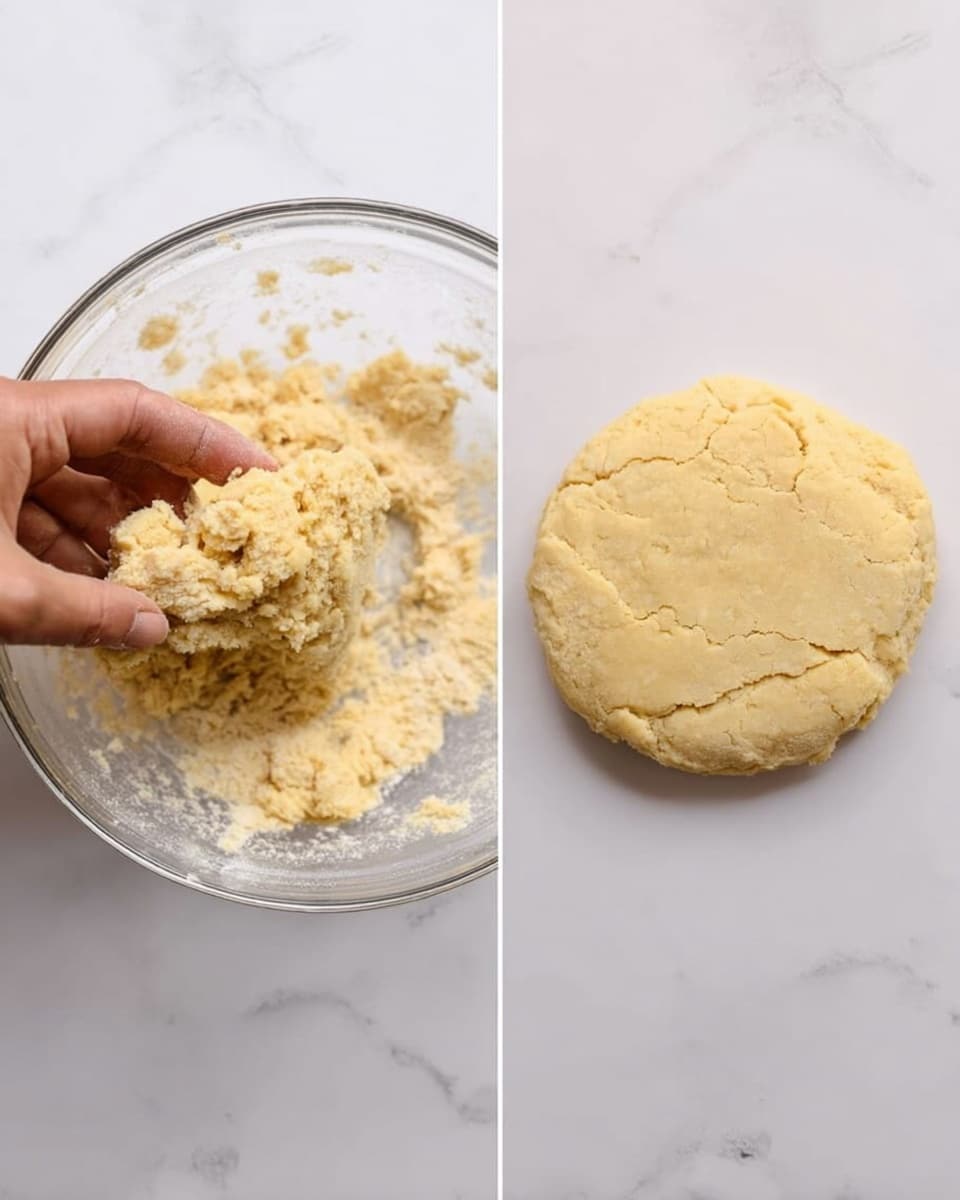
Pour in the cold milk and gently mix with a fork, fluffing the dough until it just comes together. Careful not to overmix here; you want a shaggy, slightly rough dough that promises tender scones after baking.
Step 5: Shape the Dough
Turn your dough out onto a lightly floured surface, gently pressing it into a rectangle about ¾-inch thick. Handling it with care now keeps the scones delicate, so avoid over-kneading to maintain that lift.
Step 6: Cut Out Your Scones
Flour a 2½-inch cookie cutter or a glass, then press straight down into the dough to cut out scones without twisting, which can seal edges and prevent rising. Gather scraps, reshape gently, and cut again until you have approximately nine scones.
Step 7: Prepare for Baking
Arrange your scones close together on the tray, just about half an inch apart, and brush the tops with milk for that golden, glossy finish that makes scones look as good as they taste.
Step 8: Bake
Bake in the preheated oven for 15 minutes or until tops turn a warm, inviting golden brown. If your dough feels soft or butter softens too quickly, chilling your tray for 10 minutes before baking helps maintain the rise and shape.
Step 9: Cool Before Serving
Let the scones cool on the baking tray for about 15 minutes so they firm up just enough for easy handling. For cream-filled or jam-topped scones, waiting until they’re fully at room temperature helps preserve flavors and texture.
How to Serve Easy Homemade Scones Recipe

Garnishes
Top these beauties with classic butter and jam or clotted cream for a traditional treat that never fails. Fresh berries or a sprinkle of lemon zest can also add that bright, fresh contrast to balance the richness.
Side Dishes
Pair your scones with a warm cup of tea or coffee for a delightful snack. For a wholesome brunch, serve alongside scrambled eggs, smoked salmon, or a fresh fruit salad to create a balanced spread everyone will love.
Creative Ways to Present
Transform your scones into mini sandwiches by slicing them in half and filling with whipped cream and strawberries or even savory options like ham and cheese. Another fun idea is to drizzle a simple glaze made from powdered sugar and lemon juice for a zesty finish that dazzles the eyes and palate.
Make Ahead and Storage
Storing Leftovers
Wrap leftover scones tightly in plastic wrap or store in an airtight container at room temperature for up to two days. This keeps them fresh with a tender crumb, perfect for enjoying a day or two later without sacrificing flavor.
Freezing
For longer storage, freeze unbaked scones by placing them cut side up on a parchment-lined tray until solid, then transfer to a sealed freezer bag. This way, you can bake fresh scones anytime with minimal effort.
Reheating
Reheat scones gently in a warm oven at 175°C (350°F) for about 5-7 minutes to restore freshness. Avoid microwaving to keep the texture flaky and crisp on the outside rather than chewy.
FAQs
Can I make this Easy Homemade Scones Recipe gluten-free?
Absolutely! Substitute the all-purpose flour with a gluten-free baking blend designed for pastries to retain tenderness and rise. Just make sure your baking powder is gluten-free as well.
What can I use instead of cold butter?
Cold butter is key for flakiness, but you can experiment with chilled vegetable shortening or even coconut oil for unique flavors and textures—just keep it cold and solid for best results.
Why should I avoid overmixing the dough?
Overmixing develops gluten, which can lead to dense, tough scones rather than tender and light ones. Mixing until just combined preserves that delicate texture everyone loves.
Can I add mix-ins like berries or chocolate chips?
Definitely! Fold in fresh berries, dried fruit, or chocolate chips after mixing the wet and dry ingredients for fun flavor variations. Just be gentle so you don’t crush the berries or overwork the dough.
How do I get my scones to rise higher?
Ensure your baking powder is fresh and your oven fully preheated. Also, avoid twisting the cutter when shaping and keep your butter cold throughout to maximize those flaky layers and height.
Final Thoughts
There’s something truly special about pulling freshly baked scones out of the oven, especially when made from a simple, reliable recipe like this Easy Homemade Scones Recipe. It’s a heartfelt way to treat yourself and others with a classic comfort food that’s as versatile as it is delicious. Give it a try, and I promise you’ll keep coming back for more.
Print
Easy Homemade Scones Recipe
- Total Time: 25 minutes
- Yield: 9 scones
- Diet: Vegetarian
Description
This easy scones recipe yields tender and flaky scones that are perfect for breakfast or afternoon tea. Made with simple ingredients like all-purpose flour, cold butter, and milk, this classic British treat comes together quickly and bakes to golden perfection in just 15 minutes. Serve them warm with cream, jam, or your favorite toppings for a delightful homemade treat.
Ingredients
Dry Ingredients
- 3 cups all-purpose flour
- 3½ teaspoons baking powder
- 1 teaspoon salt (omit if using salted butter)
- 3 tablespoons white granulated sugar (optional for savory scones)
Wet Ingredients
- ¾ cup unsalted butter, cold and cubed into small ¼-inch pieces
- ¾ cup whole milk, cold
Instructions
- Preheat Oven and Prepare Tray: Preheat your oven to 220°C (425°F) conventional. Line a large baking tray with parchment paper and set aside.
- Mix Dry Ingredients: In a large bowl, whisk together the flour, baking powder, salt, and sugar until well combined.
- Incorporate Butter: Add the cold, cubed butter to the dry ingredients. Using a pastry cutter or your fingers, work the butter into the flour mixture until it resembles coarse crumbs with small pieces of butter visible.
- Add Milk and Form Dough: Pour in the cold milk and gently mix using a fork to fluff the mixture until a shaggy dough forms. Avoid overmixing to keep the scones tender.
- Shape the Dough: Gather the dough into a ball and turn it out onto a lightly floured surface. Gently press it into a rectangle about ¾-inch thick, being careful not to overwork the dough.
- Cut Out Scones: Dip a 2½-inch cookie cutter or a straight-edged glass into flour. Cut the dough by pressing straight down without twisting. Gather the scraps, reshape, and cut again to make about 9 scones.
- Arrange on Baking Tray: Place the scones close together on the prepared baking tray, about ½-inch apart. Brush the tops with milk to promote golden browning.
- Chill if Needed: If the butter has softened and the dough feels very soft, chill the scones in the freezer for 10 minutes before baking to help maintain their shape.
- Bake: Bake the scones for 15 minutes, or until the tops are golden brown.
- Cool and Serve: Let the scones cool on the tray for 15 minutes before serving. For cream-filled scones, allow them to cool completely to room temperature.
Notes
- Use cold butter and handle the dough gently to ensure flaky, tender scones.
- If using a convection oven, reduce the temperature by about 20°C (approximately 25°F) and monitor baking time accordingly.
- Chilling the dough before baking helps prevent spreading and keeps the scones light and flaky.
- Sugar in the dough is optional and can be omitted when making savory scones.
- For best results, do not twist the cutter when cutting out the scones, as twisting can seal the edges and reduce rising.
- Prep Time: 10 minutes
- Cook Time: 15 minutes
- Category: Baking
- Method: Baking
- Cuisine: British

